Thanks for the compliment, I appreciate that. My reasoning for the Penny Pincher is that while I use quality parts on the car, 90% or more of them are used. I typically like to spend 50% of retail, so I'm always pinching my pennies. Although Part 2 of that was because originally I had planned on painting the car burnt orange, so it was kinda like a penny. But I'm happy we went with Red.
I made a bunch of progress this weekend and I officially have reached the end of the parts buying stage... well maybe more tires, but you get the idea. Earlier in the week I broke broke down and finally picked up a bigger torque wrench. I've needed one that goes over the 150 lb ft unit that I have a few times now and this seemed like a good time since I had to torque my crank bolt. Before I torqued it though I wanted to pin the crank which as super easy with the kit from LSX Innovations.

I only ordered the torque wrench, but when I looked in my box there was also an extension set. Funny because I've been meaning to buy another 1/2" extension. Thanks AutoZone!

I picked up another crank holding fixture that bolts in place of the starter because surprise, the overseas one that I bought didn't even come close to fitting. I got the one from MAF and it was a perfect fit. After I bolted it in position I torqued the crank bolt per the instructions. Now can I just say that 235 lb ft is a lot of torque! Glad that's over.

Next up was making a bracket to hold my reservoir/ fill cap. For a little bracket like that, it looks simple, but took me a while to get it just right. It sits about an inch higher than the highest part of the brick so it should do it's job to purge all the air out of the system. I want to replace those bolts with some button head or allen socket bolts.

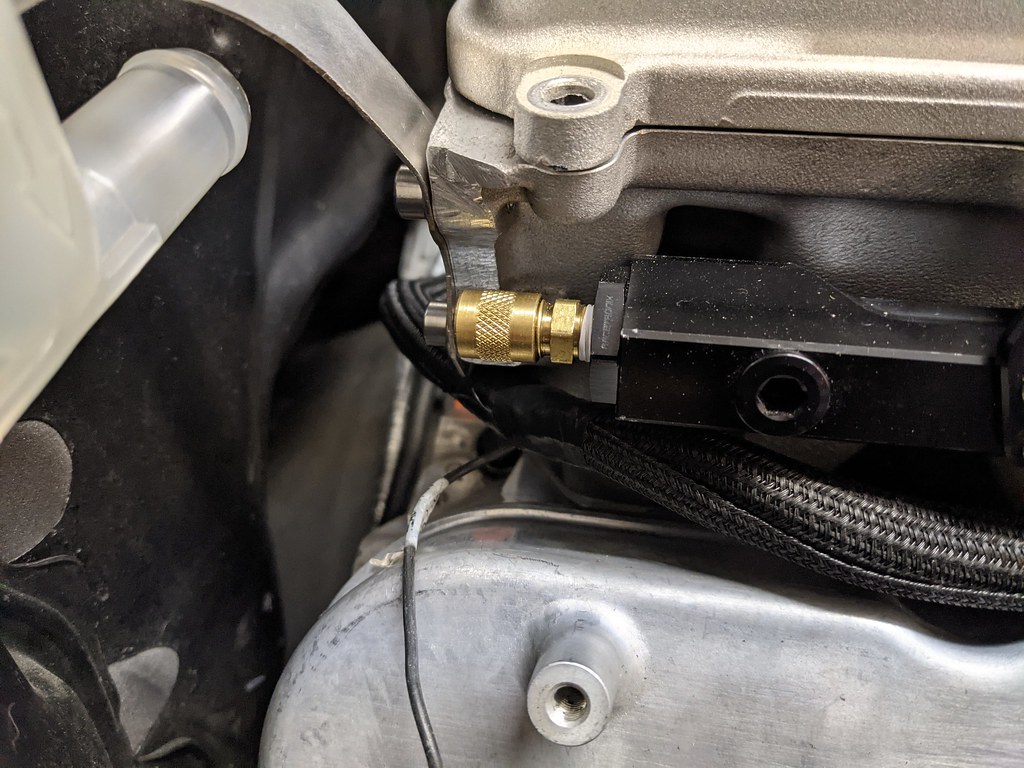
Here is the fuel pressure tester schrader valve I added. Could come in handy someday.

I've been holding off on installing anything on this side of the motor until I got the balancer torqued so I had clear access to the starter area. Installed my eBay find LS3 starter and was anxious to know if it worked. So I installed it, tested the starter solenoid and it easily bumped the motor over. Such a tease...

I also found an nice place to mount my fuel pump controller. Nice and out of the way, on this little mounting plate I made. I have the wires from the battery and crimped the terminals and it's installed on the controller now. Just need to crimp the battery side and then from the controller to the fuel pump itself. Shouldn't be long now and I can test fire the fuel pump and controller. Before I test it though I also need to make a bracket to add the flex fuel sensor inline.


Not sure why I kept putting it off, but I made my fuel crossover too. I used all Racetronix fittings and lines and they installed very easily. Very pleased with them.

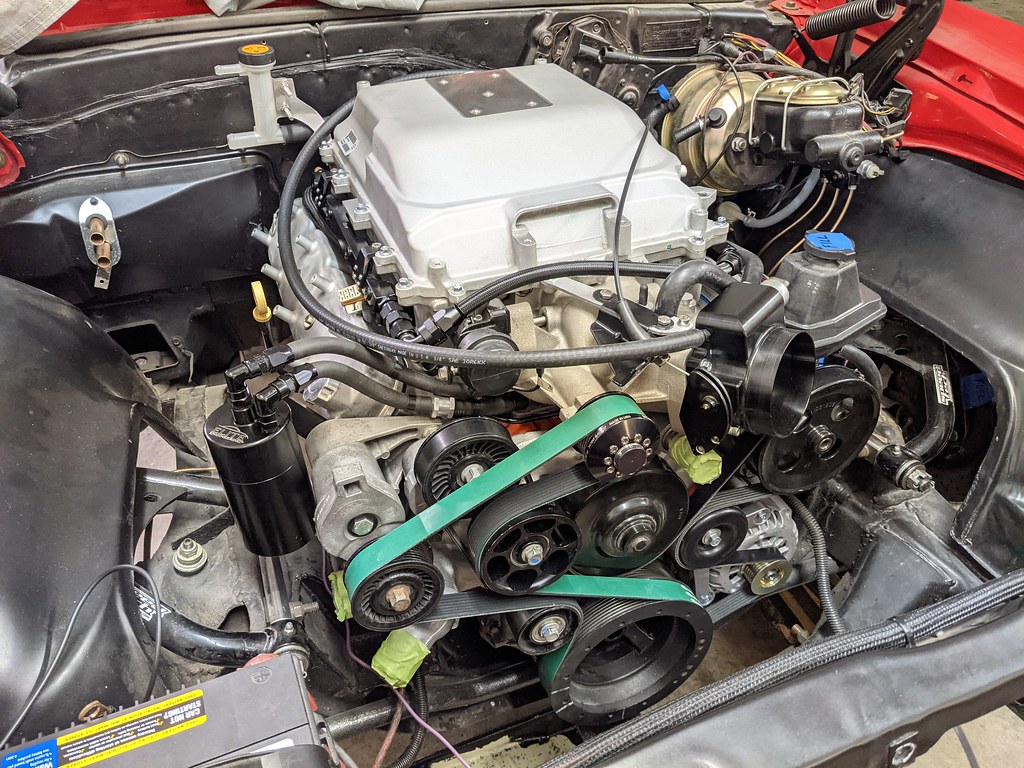
I have been working on and off for about 2 weeks trying to figure out the best place to install my catch can. I was hoping to place it roughly in the same spot as the cylinder head mount, but the 8 rib tensioner occupied one of the mounting holes. What I was going to do is shave off 1/4" from the backside of the bracket and then it would bolt in place. Then my father in law came over and said why don't you find a way to maybe bolt it to the tensioner bracket. Then a lightbulb went off and I came up with this pretty clever idea. Since the bolt hole that holds the tensioner on is tapped all the way through and is completely open on the backside, I installed a longer bolt through it and it created a stud that I could use on the backside. Then all I had to do was shorten the bracket that came with it and drill/tap one hole on the bracket. Doesn't harm the integrity of the bracket, creates a nice spot to mount the can low and gives easy access to it for service. Super happy with that install.
Took way more time that I wanted, but I'm super happy with the results. The lines are backwards incase someone notices. I'll need to switch them before I fire up the motor.


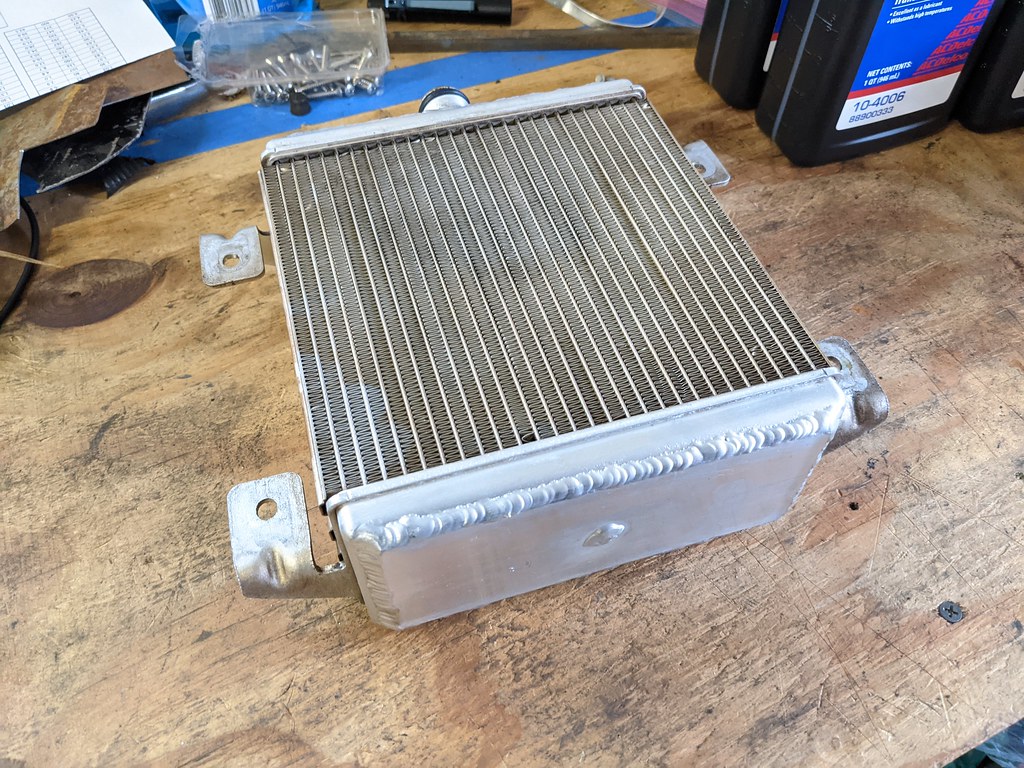
Then my last parts showed up. I had a buddy from Florida help me out and welded my brick for me. Shipped it there and back safely so that made me happy. Brian did a great job, thanks again man! For those that don't know, the stock intercooler bricks can collapse from boost even under stock psi. So it's really important to reinforce them, but especially if you overdrive the supercharger like I did.


Then the PLM heat exchanger came in. I've seen a few guys run this in a first gen Camaro one of which was an RS so I know it fits well. I'm going to copy what the RS guy did so I already know how I'm going to mount it. Just need to make a bracket.

I also opted to use the GM Synchromesh which is supposed to be the best for the TR6060 and T56 Magnum's.

Now that the intercooler brick was here I didn't waste any time and got that installed Friday night. Then I kept grabbing parts off my bench and before I knew it, the motor was completely assembled and final torqued.


I'm getting so excited now! My punch list is getting very short and I'm really down to finishing some wiring for the ECU/Fuel pump, bolting my exhaust back on, fill/top off all fluids, prime the motor and send it! I'm hoping to get a few nights in the garage this week and turn the key next weekend.
Cheers,
Ryan