Thanks Bob. The new upgrades should make a big difference. I'm not welding the tubes on the car. I debated it, but they aren't leaking currently and the plug welds look solid on the inside. I have read stories where guys weld them and ruin the housing because it warps... I'd rather not chance it. It's held up so far haha.
I was able to make some time here and there over the holiday break between visiting family to get the rear end set up. I'll do my best to do a quick write-up to hopefully give confidence to others to attempt. Really isn't that difficult with the rights parts and tools.
I started by completely disassembling the differential and took it down to the carwash to get power washed. First step is getting the new bearings pressed onto the pinion gear and carrier. The gear kit that I bought came with brand new Koyo bearings with the master install kit.
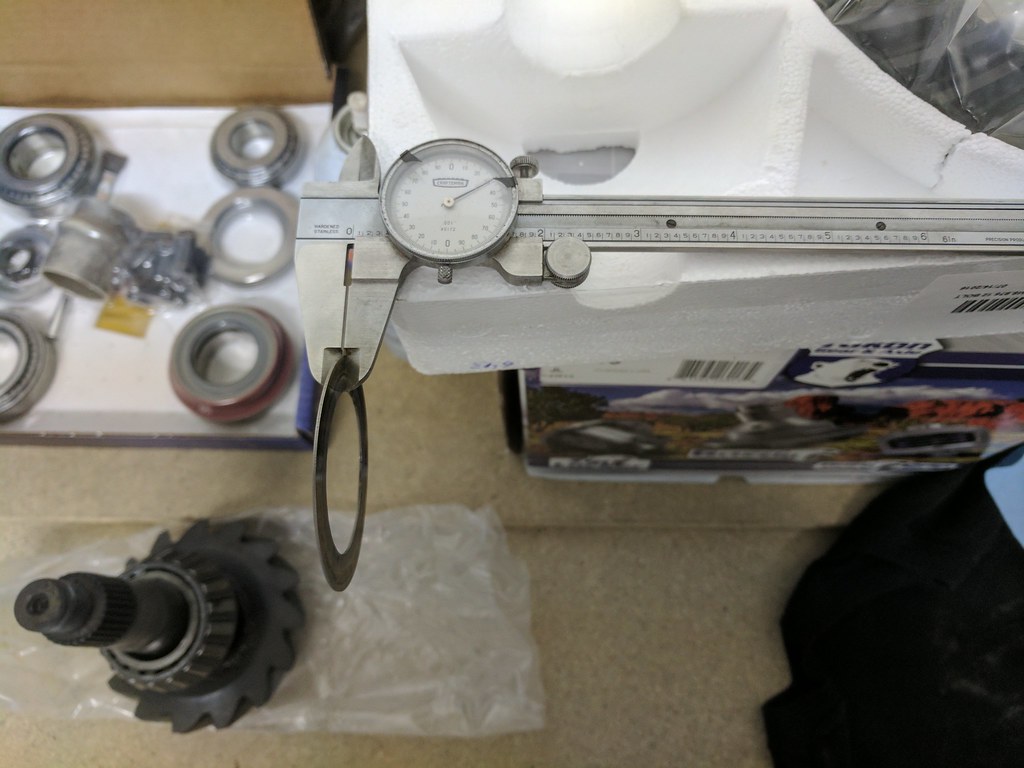
Before you can install the bearing on the pinion gear, you first need to add a shim. Best advice I've gotten was to start with the stock shim that came out of the differential. My stock shim was .0315, but if you don't have that shim my instructions that came with my kit said a stock 12 bolt shim is .030. So that would be a good starting point. I found two shims that came to .031 and used that as a starting point.


I installed new bearings and races about 3500 miles ago, but if you are doing a complete rebuild, I would suggest knocking out the races and installing new at this point. Next I took my new pinion gear and installed it in the rear end
without a crush sleeve. It's important at this step that you just snug the pinion down until there is no play in the bearings. Since there is no washer it would be very easy to get the bearings too tight and ruin them at this stage. Just get the pinion nut tight enough that the play front to back is gone and maybe a touch more to give it a bit of preload. But it doesn't take much. Spin it around to make sure there is no binding. It's also a good idea to put some gear oil on the bearings since they are brand new.

I bought this handy tool to hold the yoke while I tightened the nut and it worked beautifully. I think it was from Ratech, but I can't remember. I used this for both tightening and loosening the pinion nut.
Next up was installing the ring gear onto the carrier. I used a file on both the ring gear and carrier to make sure that the surface was completely clean and flat before installing the gear. I did actually find a little nick in the carrier surface that needed to be filed down. Would have definitely caused it to run out of true. This is an important step and is also in most instructions. The gear fought me a little getting lined up but just take your time and use a little heat. I used a small torch and lightly heated up the ring gear then made sure to get one bolt lined up and tapped it into place with a deadblow hammer. I know it's not recommended, but once I got a few of the bolts started I used them to pull the gear up flush. I only turned the bolts maybe a 1/4 turn at a time and went very slow to walk it up flush. Then I pulled all the bolts, added Loctite and torqued.


I had planned on using my old shims, but realized that at some point the old shim pack had wiggled out of place and was contacting the axle. Not good, but glad I caught it when I did. I mention this because although my rear was making no noises, I think that I didn't have enough preload on my carrier bearings. Either that or the bearings weren't quite pressed on all the way. I was able to pull the carrier out of the rear without prying on it upon disassembly. I think what happened was a kept the shims loose enough that I could pull it in and out for the next step, but never added the shims back in to give pre-load. Gotta post the good with the bad.

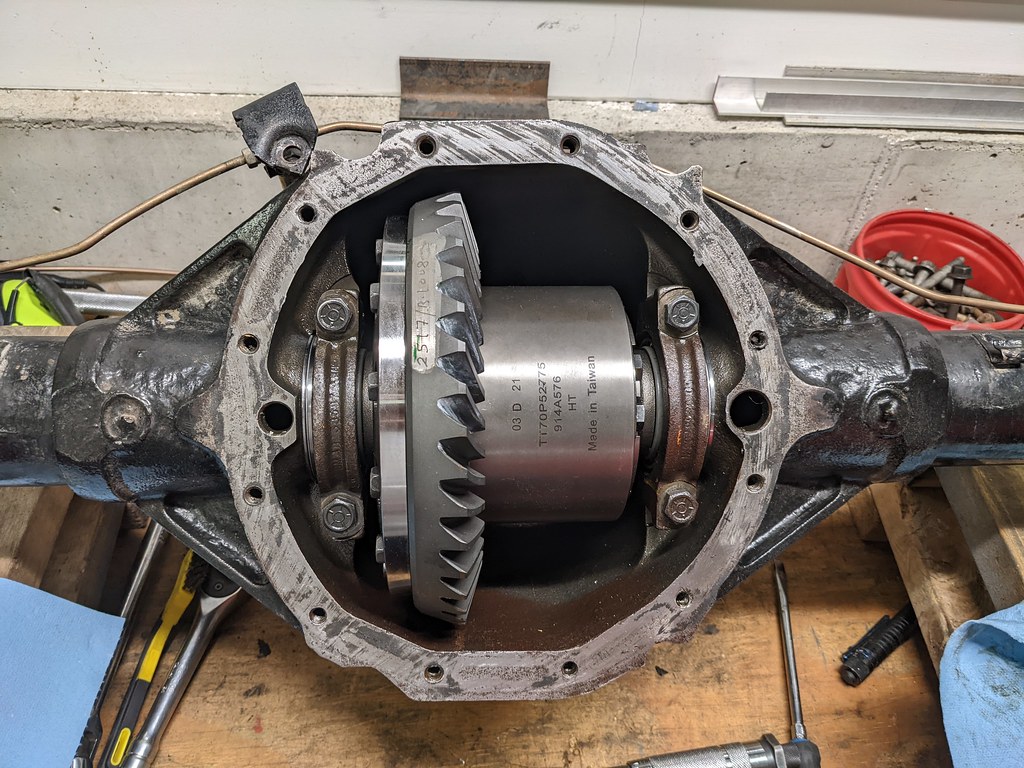
Next was to get the carrier installed in the rear to see what adjustments need to be made. What I did was kept the old shims labeled from when I disassembled earlier on. I measured those shims and use that measurement as a starting point. What's nice about these new shim packs is that they use a capture style setup, so they become almost one piece once installed.

When I used the measurements from the last go around, I found that I needed to add several shims to get the tight preload needed for the carrier bearings. I wasn't taking any chances this time and decided to get them tight from the start even if it's more challenging to get in and out. Initially I was pretty close and had a backlash of .016, but we are shooting for between .007-.009 since my gears and bearings are new.

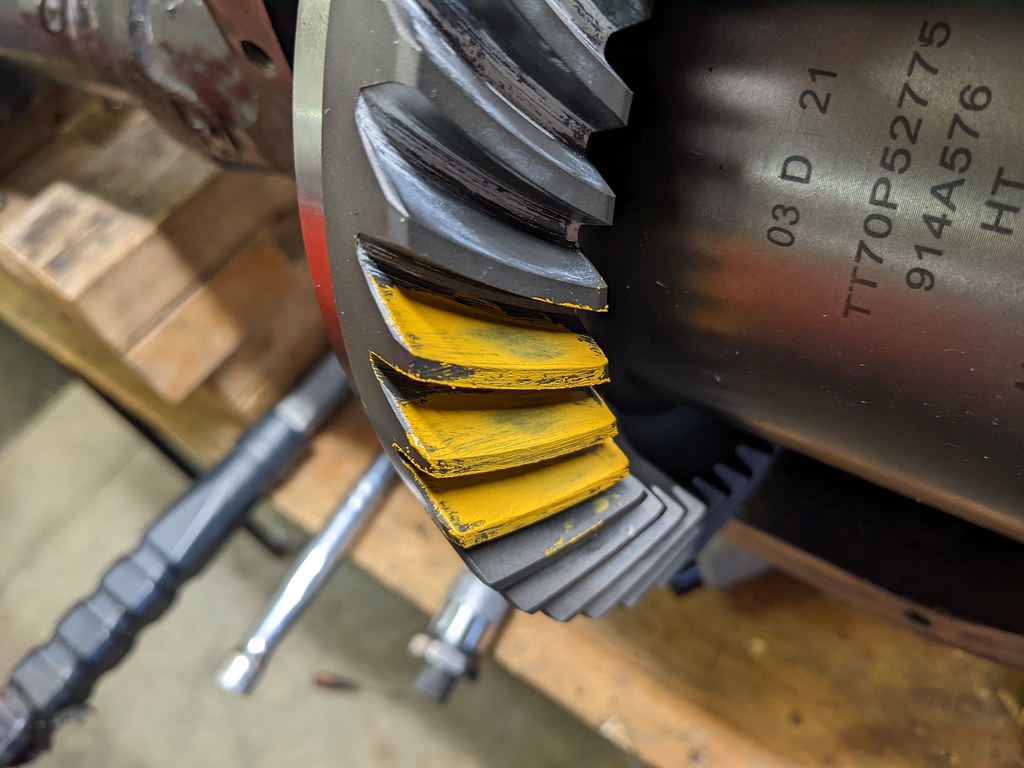
The instructions said that you need to move in increments of .003 to notice a difference, so I kept moving .005 since that was the smallest shim I had in those packs. I kept fighting with the shims because when I would swap the .005 from side to side, it would either be .006 or .011. So I measured all of my shims and played around with it and got it to .010. I decided that it was good enough. So I painted the gears with the yellow paint to see where my pattern was. The instructions I had gave a ton of scenarios for what was acceptable and mine look good according to the pictures. pattern is mostly centered top bottom and left right on the gear faces.


Then I blew everything apart to prep for final assembly. I pulled off the yoke applied silicone to the splines and both sides of the washer. This time I installed my old crush sleeve and put it all back together with Loctite on the pinion nut. If you are using a new crush sleeve you have to get ready to crush it. It takes something like 400 lb ft to get it to crush so make sure you eat your Wheaties. I re-used my crush sleeve since it was new and still had tons of tension. As a matter of fact it had so much that I had to crush it more to get the 14-19 in lb rotational torque. I used that yoke holder and added a bar for more leverage. I don't have a dial style torque wrench for in lb, but have a bar style and click type. I used both of those to check one another and I feel confident my settings are good.
After I got the pinion nut torqued I reinstalled the carrier with the shim packs and tapped it all back into place. Torqued the carrier caps and I got lucky or something because when I rechecked the backlash, I was right on .009! I'd rather have mine on the loose side anyway than too tight.


Then with it all torqued down, I test fit my TA cover. Looks really good now! I've always wanted one of those covers and so glad I went for it this time around.


It's not quite done yet because I still need to paint the raw steel ends of my axles then install with the c-clips and center plug. Once that's done though I can button it all back up and put it back in the car. I first need to find someone to help me get it off my work bench. It's way heavier now that it's fully loaded!
I also want to say that the car community is so great. Thanks to a fellow member of Camaros.net who sent me some parts he won't be using. Thanks Frank!! It's a set of 67 spring perches for running my springs inboard. These should work perfectly for me.

I also need to re-clock my brake line tabs since they were hitting the exhaust. I didn't realize that, so I will just move them down more in line with the stock brake line tabs. Then I can get the rear back under the car and start on the frame connectors.
Cheers,
Ryan