Author Topic: Madaguy 1955 Nomad Build  (Read 63184 times)

ryeguy2006a

  • Oracle Forum Member
  • *
  • Posts: 6117
Re: Madaguy 1955 Nomad Build
« Reply #280 on: October 02, 2024, 05:45:57 AM »
Thanks! I'm hoping that the shifts are just more firm with the kit and one other benefit is that it's supposed to hold the line pressure longer in all the gears as well as providing a dual feed for third gear which is supposed to be a fail point in these transmissions. I think the converter will also make a big difference. If I get a chance, I hope to button up the trans re-install today at lunch. Then the last thing will be adding a hanger for the exhaust. There's a car show on Saturday right in town that I hope to attend so I need to get it back together soon.

1976 Trans Am LS1 and much more...SOLD
1968 Camaro LSA, T56 Magnum, and much more...SOLD

Current Project: 1955 Nomad LC9, 4L80e, C5 brakes and etc...

rkellerjr

  • Oracle Forum Member
  • *
  • Posts: 6779
  • When you turn your car on does it return the favor
Re: Madaguy 1955 Nomad Build
« Reply #281 on: October 02, 2024, 07:43:33 AM »
I think your gonna like those changes.

ryeguy2006a

  • Oracle Forum Member
  • *
  • Posts: 6117
Re: Madaguy 1955 Nomad Build
« Reply #282 on: October 16, 2024, 06:29:56 AM »
Was finally able to upload the pictures and get this thread updated. After my last post, I finished up the exhaust hanger and buttoned up the rest of the car to get it out to see if the new converter made any difference. I thought on how I wanted to built the exhaust hanger for quite a while. I bought a kit with the rods like I welded to the tailpipe, but wasn't happy with how much slack there was. The isolator hole was about twice the diameter of the rod, so I found a bolt in my bin that had a tighter fit in the isolator, then turned it down to make a shoulder bolt that would tighten down on a factory exhaust hanger.


Then after a bunch of test fits, I got the curvature right on the rod and welded it to the tail pipe. I had some high temp aluminum paint that matched almost perfectly with the aluminized coating on the tail pipe. 


It's got a nice snug fit with the slightest amount of upward pre-load to take the pressure off the manifolds. Really happy with how it turned out.


The new transmission pan hangs a bit lower than I would have liked, but my car isn't slammed, so it should be fine. I'm just more aware of it now over bumps and whatnot.


After the tailpipe was finished, the car was ready to get off of the wheel stands and out for a test drive. I topped the transmission off with 10 quarts, but it wanted another 2 to get to the hot full line. I let the car idle in the driveway for a little while at first making sure to be in each gear for about 30 seconds so that the fluid could get all throughout the trans. Put it back in park and it was down about 2 quarts, so I topped it off and took the car out. The engine ran the same, but what I noticed immediately is that the throttle response was much better and the trans wasn't lazy going from forward to reverse. Took it down the road and when I was easy on the throttle, it drove pretty much the same. However, when I got on the throttle it was significantly more responsive and drove like a car instead of a truck! The car is way more fun to drive and feels much faster when you go WOT. It was a lot of work to get that transmission in and out, but it was worth it once I got behind the wheel. One other thing worth mentioning is that when I put the new transmission pan back on I used a Lube-Locker gasket. I've heard good things about them, and wanted to give it a try myself because my old pan wept fluid on my new concrete floor which irritated me. I'm happy to report after putting a few hundred miles on it, there isn't a drop on the cardboard I put under it.

My in-laws were coming in town shortly after I got the car back up and running and they wanted to go on a few rides. We went to a really nice winery up the road from us, Barboursville Vineyards, and had a great time.


While we were driving around though, I started to smell gas fumes faintly. I wasn't sure what was going on because it was running so well. But after troubleshooting for a while, I think I found the cause. I was getting a significant amount of oil pooling in the intake, and the #8 cylinder looked to be fouled out. I'm not sure if the oil fouled it out, but it's certainly not great. I had another spare set of plugs so I swapped them in and it ran better without the fumes. I'm now in the market for a catch can and leaning towards an Elite Engineering unit.


While my father-in-law was here we decided to tackle the rear wood floor for the wagon. I found a template online and we got to work.


I got busy and didn't take many pictures of the during process, but here's how it turned out. I'm very happy with how it turned out.


Looks great, but really highlights the need for me to replace the carpet pieces on the upper and lower seats. The carpet kit I bought came with those pieces just need to find the time to replace them.


Feels good to have the car a little more complete, and up and running again. Hoping to figure out the PCV/oil issue, but I think that will be solved by adding a catch can.

Cheers,
Ryan

1976 Trans Am LS1 and much more...SOLD
1968 Camaro LSA, T56 Magnum, and much more...SOLD

Current Project: 1955 Nomad LC9, 4L80e, C5 brakes and etc...

rkellerjr

  • Oracle Forum Member
  • *
  • Posts: 6779
  • When you turn your car on does it return the favor
Re: Madaguy 1955 Nomad Build
« Reply #283 on: October 16, 2024, 06:54:47 AM »
As always, great job!

roadking77

  • Oracle Forum Member
  • *
  • Posts: 13658
Re: Madaguy 1955 Nomad Build
« Reply #284 on: October 16, 2024, 02:54:58 PM »
Looks great Ryan, I am glad the transmission work made a difference.
Finished!
77 T/A - I will Call this one DONE!
79 TATA 4sp-Next Project?
79 TATA - Lost to Fire!
86 Grand Prix - Sold
85 T/A - Sold
85 Fiero - Sold
82 Firebird - Sold
'38-CZ 250
'39-BSA Gold Star
'49-Triumph 350
'52-Ariel Red Hunter
'66-BSA Lightning
'01-HD RoadKing

Re: Madaguy 1955 Nomad Build
« Reply #284 on: October 16, 2024, 02:54:58 PM »

5th T/A

  • Oracle Forum Member
  • *
  • Posts: 1555
Re: Madaguy 1955 Nomad Build
« Reply #285 on: October 20, 2024, 08:18:24 AM »
Ryan,

This Nomad has come a long way in about two years. Even though it's not finished, you have a nice balance of taking it out for cruises and still making good progress.

Also, nice job posting all the details with pictures!

I am surprised TAC has been so quiet the last couple days. Maybe people are enjoying the mild fall weather!
1980 T/A with a Pontiac 461

Gone but not forgotten;
1973 T/A 455
1975 T/A 400
1978 T/A W72
1982 T/A cross fire injected

Two wheel toys;
2014 Harley Ultra Classic Limited
2013 Honda CB1100
2010 Yamaha Vmax
1982 Yamaha Seca 750

FormTA

  • Oracle Forum Member
  • *
  • Posts: 5736
  • Life is short, have fun, Drive a T/A
Re: Madaguy 1955 Nomad Build
« Reply #286 on: October 22, 2024, 09:59:34 AM »

Great to hear tye trans is working well. I really love the exhaust hanger!
79 Trans am low buck LS swapped
79 Formula 301 (Work in progress)
67 RS Camaro (waiting it's turn)
69 Dodge charger on late model charger chassis
49 Ford F1 on a 2003 Chevy ZR2 Chassis (current project)
Names, Luke. If I hear anyone telling me they're my father....

ryeguy2006a

  • Oracle Forum Member
  • *
  • Posts: 6117
Re: Madaguy 1955 Nomad Build
« Reply #287 on: October 23, 2024, 09:02:28 AM »
Thanks guys! I'm stoked that the transmission is working so well now. It's a very fun car to just cruise around.

Not much on the car other than driving it, but I did order some rear speakers and temporarily hooked up an old radio I had with some zip ties. The engine sounds great, but I do like some tunes while cruising and I know my family will appreciate it.


It's a cheap Android based radio, and has a lot of cool bells/whistles. There's even an option to hook up a rear mounted camera. I need a new background photo too.


Grabbed some super cheap 6x9 boxes that I was hoping would fit under the rear seat, but there's not a chance at all they will fit.


They fit here pretty nicely, and I can always remove them quickly if I need to fold the rear seats down.


The other sort of car related update was the Lego that my son built for me to take to car shows. He looked a few pictures and came out with this after about an hour building. Very impressed!


Hoping to get to some nice fall car shows over the next month or so.

Cheers,
Ryan

1976 Trans Am LS1 and much more...SOLD
1968 Camaro LSA, T56 Magnum, and much more...SOLD

Current Project: 1955 Nomad LC9, 4L80e, C5 brakes and etc...

roadking77

  • Oracle Forum Member
  • *
  • Posts: 13658
Re: Madaguy 1955 Nomad Build
« Reply #288 on: October 24, 2024, 06:54:09 AM »
I love the lego car. Tell your son it gets TAC approval :lol:
Now you need to build a console for the stereo. When I was a young fellow I always had one of the best stereos you could buy in my car. I would upgrade every 6 months or so with something different or nicer, selling the old units to friends. I had disposable income :-o Now, I dont really listen to anything other than the shop radio. I suppose its because my hearing is bad. Have never got the radio hooked up in the 77, but I do want to have it working in the 79. My grandson is obsessed with computers. One thing  he insisted on when I first started working on the 79 was a large screen in the dash ala Tesla. I joked and said yes it will have one. I hope hes not too disappointed!
Finished!
77 T/A - I will Call this one DONE!
79 TATA 4sp-Next Project?
79 TATA - Lost to Fire!
86 Grand Prix - Sold
85 T/A - Sold
85 Fiero - Sold
82 Firebird - Sold
'38-CZ 250
'39-BSA Gold Star
'49-Triumph 350
'52-Ariel Red Hunter
'66-BSA Lightning
'01-HD RoadKing

ryeguy2006a

  • Oracle Forum Member
  • *
  • Posts: 6117
Re: Madaguy 1955 Nomad Build
« Reply #289 on: October 25, 2024, 05:55:32 AM »
I approve of the large screen stereo as long as you don't cut the dash! :)

1976 Trans Am LS1 and much more...SOLD
1968 Camaro LSA, T56 Magnum, and much more...SOLD

Current Project: 1955 Nomad LC9, 4L80e, C5 brakes and etc...

76455sd

  • Oracle Forum Member
  • *
  • Posts: 3095
Re: Madaguy 1955 Nomad Build
« Reply #290 on: October 25, 2024, 08:18:58 AM »
Great job on the Lego car. I like that he’s got the hood ornament on there.  :D
Steve D
'76 LE 455/4speed/solid roof - SOLD
'02 WS6 T/A convertible

langss

  • Active Forum Member
  • *
  • Posts: 362
Re: Madaguy 1955 Nomad Build
« Reply #291 on: October 26, 2024, 07:45:07 PM »
Thanks for the "Inspiration" I have a Pioneer AM/FM 8 Track Player with 2 Speakers. I have been looking for something to put in the dash of my Chevelle. I'll just put the AM radio back in and put the above back under the dash were it was installed in 1971....Problem Solved. Probably never hear it anyway....lol.... 

ryeguy2006a

  • Oracle Forum Member
  • *
  • Posts: 6117
Re: Madaguy 1955 Nomad Build
« Reply #292 on: November 07, 2024, 01:14:43 PM »
The car has been running great since I got it up and running, but recently I've been having the car run a little rich. The tune looked good to me, and I didn't see where it was adding more fuel. I did some troubleshooting and noticed cylinder #8 was running cooler and when I pulled the plug it was damp. After a little more troubleshooting I confirmed I had a dead coil. A buddy of mine let me borrow some extra coils so that I could confirm, and sure enough that was the issue. I found some low mile coils online and should have those soon. For now he's letting me use these coils so I can keep running the car.


When I was logging the car after the coil was swapped out, the learn table started pulling about 5% fuel out of the car so I think that it was running better. Then as I was reviewing the log data, I noticed that the AFR was bouncing around a ton. Something else is definitely going on. It should fluctuate, but not like this.


I also noticed that when I pulled a few plugs to see what the motor was doing, and I had quite a bit of oil on the threads. This generally means that there is oil being pulled into the engine either through valve seals or another method. It's pretty common for LS motors to pull oil from the valve covers, so I was pretty confident that was my issue. I pulled the intake and found a lot of oil. I'm thinking the combination of the PCV oil and a dead coil was the reason for the fuel smell.


I have been running the DOD delete valley cover since I first got the engine together, but always thought I may need to swap it out for one with a built in PCV since this design pulls much less oil. Wow, didn't realize how high these had gotten in the used market! Last time I bought one it was in the $100 range, but now they are $250-300 now. I shopped around for a while and found a guy on LS1tech who sold me one for $100 bucks shipped. So I was stoked about that.


Pulled the intake again so that I could get to the valley cover.


While it was all apart, I inspected everything I could and it looked great. One thing I noticed though was all of the intake valves had pools of oil in them! Not sure why it all of a sudden started consuming oil, but that was surprising.


Pulled the old one and swapped the new one, then torqued it back up. Very simple swap since the LS motors are all gasketed. While the intake was off I cleaned out all of the oil with parts cleaner.


After I got the intake back on, I took the path of least resistance and reused the old PCV line that was on the intake originally. I was able to rotate 180* and just ran a hose down to the new valley cover. I didn't get a picture, but the tube that goes into the intake was tapered away from airflow so when I flipped it around it would have actually caught air into the tube. I back cut the taper in 180* so that it acted just like the stock piece. I'll likely change this tube anyway since I will be upgrading to a Holley intake at some point in the future. For now it works perfect and didn't cost a dime!


All back together. I did some WOT pulls so that I could get all of the oil out, and then did a datalog to see if the updates I made changed the AFR. Now the AFR isn't changing so rapidly, and I think is more inline with how it should be operating. I'm sure that there is still a bit of oil being pulled out of the intake, but I'm much happier with those curves.


Hoping to get some more miles on and read the plugs to see if that makes a difference in the longer term.

Cheers,
Ryan

1976 Trans Am LS1 and much more...SOLD
1968 Camaro LSA, T56 Magnum, and much more...SOLD

Current Project: 1955 Nomad LC9, 4L80e, C5 brakes and etc...

ryeguy2006a

  • Oracle Forum Member
  • *
  • Posts: 6117
Re: Madaguy 1955 Nomad Build
« Reply #293 on: November 07, 2024, 04:13:33 PM »
I have a few parts updates too. I picked up some inner fenders in great condition locally a few weeks ago. I've been slowly cleaning them up and hoping to get them installed very soon so that I can finish the wiring. The fan wiring is just looped on the battery and it drives me nuts when I open the hood. I recruited some help to get them disassembled.


I got the driver's side all cleaned up with a wire wheel and found a few spots that need to be repaired, but overall in great condition. I love using original parts when I can even if it takes a little more effort.


Browsing on eBay I found a guy who sells blemished parts and had a set of CPP C5 drop spindles and C7 hubs for a significant discount. I couldn't pass them up and pulled the trigger. Ever since I put the car together I wanted to drop the front, and this also solves my wheel stud issue as well since this comes with longer wheel studs. I've heard that the hubs that come with the CPP C5 kit are low quality, but these are the upgraded HD C7 version which are meant for autox. I haven't seen any reviews on those yet, so I figured I'd try them out. The parts look brand new and never installed so maybe they were display pieces or something. Hoping to collect more steering parts and get these installed soon with a pair of cheap tubular A-Arms.


Lastly, I decided to swap out the janky DIY shackles that came on my car. I thought they would be a quick install, but I was way wrong. This were a huge PITA. I thought I could just force them on and pop them down, but I ended up needing to pull the ubolts to give me enough room to swing the spring over and pop it on the shackle.

What I started with:


I bought some of the poly stock style shackles and made sure to lubricate them well.


What a mess. The stock bushings were toast, and there was quite a bit of rust in the leaf spring.


After fighting with the spring for an hour or so I had to just walk away. Came back and realized that I just needed to remove the ubolts to give me enough room to swing it over. Worked like a charm, just ruined the ubolts in the process since they had been installed for a long time. I put the shackle in the top hanger, swung it down, then with the leaf spring loose, popped it on and installed the outer shackle and the two nuts. Sometimes you just have to walk away.


Very happy with the fitment, and the bonus was that it gave me roughly a 2" drop since the stock springs are so worn. Eventually I'll grab some drop springs, but for now, these will articulate much better and not clunk when I go around a corner.


Very pleased with the improvement in ride quality. The rear end definitely feels smoother when going around a corner or over bumps.

Cheers,
Ryan

1976 Trans Am LS1 and much more...SOLD
1968 Camaro LSA, T56 Magnum, and much more...SOLD

Current Project: 1955 Nomad LC9, 4L80e, C5 brakes and etc...

N PRGRES

  • Oracle Forum Member
  • *
  • Posts: 1296
Re: Madaguy 1955 Nomad Build
« Reply #294 on: November 08, 2024, 09:30:21 AM »
If only there was a side photo to show the stance...... lol
Dave

81 Trans Am w/73 400.

Re: Madaguy 1955 Nomad Build
« Reply #294 on: November 08, 2024, 09:30:21 AM »

ryeguy2006a

  • Oracle Forum Member
  • *
  • Posts: 6117
Re: Madaguy 1955 Nomad Build
« Reply #295 on: November 08, 2024, 09:45:35 AM »
I only took it out once afterwards on my lunch break and haven't had it out since. Right now it likely has a "Carolina Lean" because it's higher in the front than the back. Once I get the drop spindles installed it should have a pretty killer stance.

1976 Trans Am LS1 and much more...SOLD
1968 Camaro LSA, T56 Magnum, and much more...SOLD

Current Project: 1955 Nomad LC9, 4L80e, C5 brakes and etc...

roadking77

  • Oracle Forum Member
  • *
  • Posts: 13658
Re: Madaguy 1955 Nomad Build
« Reply #296 on: November 08, 2024, 02:33:13 PM »
I only took it out once afterwards on my lunch break and haven't had it out since. Right now it likely has a "Carolina Lean" because it's higher in the front than the back. Once I get the drop spindles installed it should have a pretty killer stance.
Look what happens to you when you move to the mountains of Virginia :lol: :lol:
Finished!
77 T/A - I will Call this one DONE!
79 TATA 4sp-Next Project?
79 TATA - Lost to Fire!
86 Grand Prix - Sold
85 T/A - Sold
85 Fiero - Sold
82 Firebird - Sold
'38-CZ 250
'39-BSA Gold Star
'49-Triumph 350
'52-Ariel Red Hunter
'66-BSA Lightning
'01-HD RoadKing

rkellerjr

  • Oracle Forum Member
  • *
  • Posts: 6779
  • When you turn your car on does it return the favor
Re: Madaguy 1955 Nomad Build
« Reply #297 on: November 09, 2024, 07:07:35 AM »
I only took it out once afterwards on my lunch break and haven't had it out since. Right now it likely has a "Carolina Lean" because it's higher in the front than the back. Once I get the drop spindles installed it should have a pretty killer stance.
Look what happens to you when you move to the mountains of Virginia :lol: :lol:

LOL

ryeguy2006a

  • Oracle Forum Member
  • *
  • Posts: 6117
Re: Madaguy 1955 Nomad Build
« Reply #298 on: November 20, 2024, 12:05:51 PM »
Yeah, I'm pretty much a mountain man at this point haha.

Here's a really cool picture someone took as I was leaving my local Cars and Coffee. 


Love the action shot!

1976 Trans Am LS1 and much more...SOLD
1968 Camaro LSA, T56 Magnum, and much more...SOLD

Current Project: 1955 Nomad LC9, 4L80e, C5 brakes and etc...

roadking77

  • Oracle Forum Member
  • *
  • Posts: 13658
Re: Madaguy 1955 Nomad Build
« Reply #299 on: November 20, 2024, 06:06:50 PM »
Those are great shots. I particularly like the second one with your son looking out of the back window.
Finished!
77 T/A - I will Call this one DONE!
79 TATA 4sp-Next Project?
79 TATA - Lost to Fire!
86 Grand Prix - Sold
85 T/A - Sold
85 Fiero - Sold
82 Firebird - Sold
'38-CZ 250
'39-BSA Gold Star
'49-Triumph 350
'52-Ariel Red Hunter
'66-BSA Lightning
'01-HD RoadKing

N PRGRES

  • Oracle Forum Member
  • *
  • Posts: 1296
Re: Madaguy 1955 Nomad Build
« Reply #300 on: November 21, 2024, 06:51:36 AM »
Nice photos!
Dave

81 Trans Am w/73 400.

rkellerjr

  • Oracle Forum Member
  • *
  • Posts: 6779
  • When you turn your car on does it return the favor
Re: Madaguy 1955 Nomad Build
« Reply #301 on: November 21, 2024, 07:04:26 AM »
Great pics!

ryeguy2006a

  • Oracle Forum Member
  • *
  • Posts: 6117
Re: Madaguy 1955 Nomad Build
« Reply #302 on: December 03, 2024, 09:53:28 AM »
Thanks guys!

It's been a little while since I've had a meaningful update, but lots has happened. Several weeks ago I was able to get my car on the Chassis dyno. The local tuner had a Dyno Day where you pay for a few pulls. It was a lot of fun to see what the car could do after all the hard work I've put into it. I was hoping that it would make more power on the dyno, but regardless it's a great baseline. I think we can easily double that with some boost :).


I went back and forth a lot on what to do with the front suspension because the control arms are quite worn. They have begun to squeak after I drive around for about 20 mins, so it was time to do something. I submitted a lowball offer on eBay to a set of the cheap tubular control arms, and they accepted. They were cheaper than it would be if I tore my stock parts and replaced with new bushings and ball joints. I know that they are copies, so there is also some steering benefits to the increased caster and camber curve.


I started by pulling off the C5 brakes that I'll be re-using to get down to the stock spindles with 61-68 Impala hubs. The caliper brackets are from Kore3 and I'll be selling those to offset my project costs.


I used the weight of the car and a safety chain to pull the stock springs which I'll be reusing.


First test fit of the tubular arms and the CPP C5 drop spindles. Everything fit decent out of the box. I did need to drill out the upper control arm cross shafts once size up since they were too tight to slide on out of the box. Not sure if it was a metric vs. SAE issue, but after they were upsized, the arms slid right on. Once they were fit up, I did need to give the front side of the brace several taps with the BFH so it didn't contact the upper tube. Otherwise, I was pleased with the fitment out of the box.


Once I determined that everything fit properly, I cleaned up and painted the spindles and hubs. They had a bit of surface rust and wanted to install clean parts.


Once everything was cleaned and painted it was time to do a final install. I had everything laid out and ready to go. It's so much more fun to install clean new parts than working with old crusty parts. Although the stock springs are used and unknown, I sprayed them with a little leftover Torch Red touch up paint I had from my Camaro. No performance advantage, but it does look cooler.


After fighting with trying to reinstall the spring using the floor jack method, I had to go and rent a spring compressor from AutoZone.


Now for those that have a keen eye, you may have noticed that the Kore3 brackets installed the calipers on the leading side of the spindle, but the CPP mounts are on the trailing side. This means that if I was to mount the calipers, my bleeders would be pointing down which is no good for future bleeding. I had to swap sides which wasn't a huge deal, but the driver's side required me to shorten the hardline since I had to make them a little longer initially to use the stock C5 brake Hoses. I just worked quickly and methodically to minimize the fluid loss and it worked out great. I even remembered to put the flare nut on so I didn't have to cut off and try again haha.


That was pretty much it. I didn't get any pictures of me reinstalling the rotors and brakes, but they were already broke in so it was just replacing the existing parts I had once I swapped calipers.

This is the picture I took when I installed the stock shackles that lowered the rear pretty substantially, but hadn't touched the front yet.


With the new 2" drop springs. I was expecting a bit more of a drop, but I only have about 5 miles on the setup so the springs should settle a bit with more driving. If not, I may cut a half coil out and see what that gets me.


Can't really comment on any added performance steering benefits until I get my alignment dialed in. Initial thoughts are it does seem to handle better and I don't notice quite as much body roll.

Cheers,
Ryan

1976 Trans Am LS1 and much more...SOLD
1968 Camaro LSA, T56 Magnum, and much more...SOLD

Current Project: 1955 Nomad LC9, 4L80e, C5 brakes and etc...

N PRGRES

  • Oracle Forum Member
  • *
  • Posts: 1296
Re: Madaguy 1955 Nomad Build
« Reply #303 on: December 03, 2024, 11:06:40 AM »
Looks great!
Dave

81 Trans Am w/73 400.

rkellerjr

  • Oracle Forum Member
  • *
  • Posts: 6779
  • When you turn your car on does it return the favor
Re: Madaguy 1955 Nomad Build
« Reply #304 on: December 03, 2024, 01:54:35 PM »
That car is moving right along.

Re: Madaguy 1955 Nomad Build
« Reply #304 on: December 03, 2024, 01:54:35 PM »

roadking77

  • Oracle Forum Member
  • *
  • Posts: 13658
Re: Madaguy 1955 Nomad Build
« Reply #305 on: December 06, 2024, 07:42:20 AM »
As usual, nice work Ryan.
Finished!
77 T/A - I will Call this one DONE!
79 TATA 4sp-Next Project?
79 TATA - Lost to Fire!
86 Grand Prix - Sold
85 T/A - Sold
85 Fiero - Sold
82 Firebird - Sold
'38-CZ 250
'39-BSA Gold Star
'49-Triumph 350
'52-Ariel Red Hunter
'66-BSA Lightning
'01-HD RoadKing

5th T/A

  • Oracle Forum Member
  • *
  • Posts: 1555
Re: Madaguy 1955 Nomad Build
« Reply #306 on: December 10, 2024, 05:37:34 PM »
Ryan,

This car sure has come a long way in a relatively short time. Nice workmanship and documenting with photos. I also love how you have your son helping out, creating some memories that will last forever.
1980 T/A with a Pontiac 461

Gone but not forgotten;
1973 T/A 455
1975 T/A 400
1978 T/A W72
1982 T/A cross fire injected

Two wheel toys;
2014 Harley Ultra Classic Limited
2013 Honda CB1100
2010 Yamaha Vmax
1982 Yamaha Seca 750

ryeguy2006a

  • Oracle Forum Member
  • *
  • Posts: 6117
Re: Madaguy 1955 Nomad Build
« Reply #307 on: January 10, 2025, 03:04:38 PM »
SO GLAD THE SITE IS BACK UP AND RUNNING!! HUGE THANKS TO MR BANDIT!!!

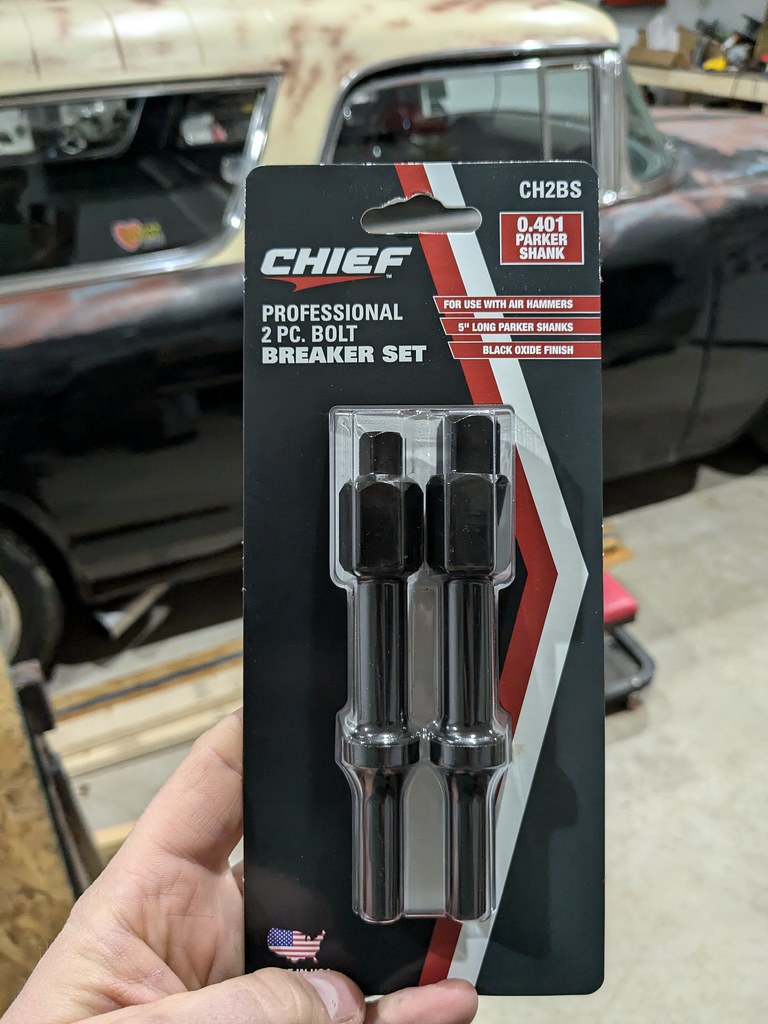
Been a few weeks since my last update, but haven't had any real progress on the car. I did find a great tool that I think everyone working on older cars should put in their toolbox. It's an attachment that goes on an air hammer that allows you to put on a socket. I used it for the frozen stuck Philips head bolts on my tailgate hinges and was able to loosen all 8 without breaking them off. Absolutely amazed. I picked mine up at Harbor Freight. Once it was loosened, I was able to adjust the tailgate for a better fit.


If you haven't noticed a common theme in my build, I'm a sucker for a good deal and like to buy things used when I can. Back before Thanksgiving I found a guy who posted on a different forum a bunch of parts for sale including an LS6 intake which piqued my interest because he was only about an hour and 20 mins from me. He didn't post a price or a really detailed list of parts either, but it was enough that I messaged him. I was stoked when he got right back to me with a very reasonable $600 bucks. It was a fantastic deal and I made arrangements to pick it up as soon as I could. Come to find out he had a ton of either brand new or very lightly used parts. He sold his car in 2015, but many of the parts were bought back in 2005-08 timeframe. When I got there he actually found even more parts, but didn't charge more.


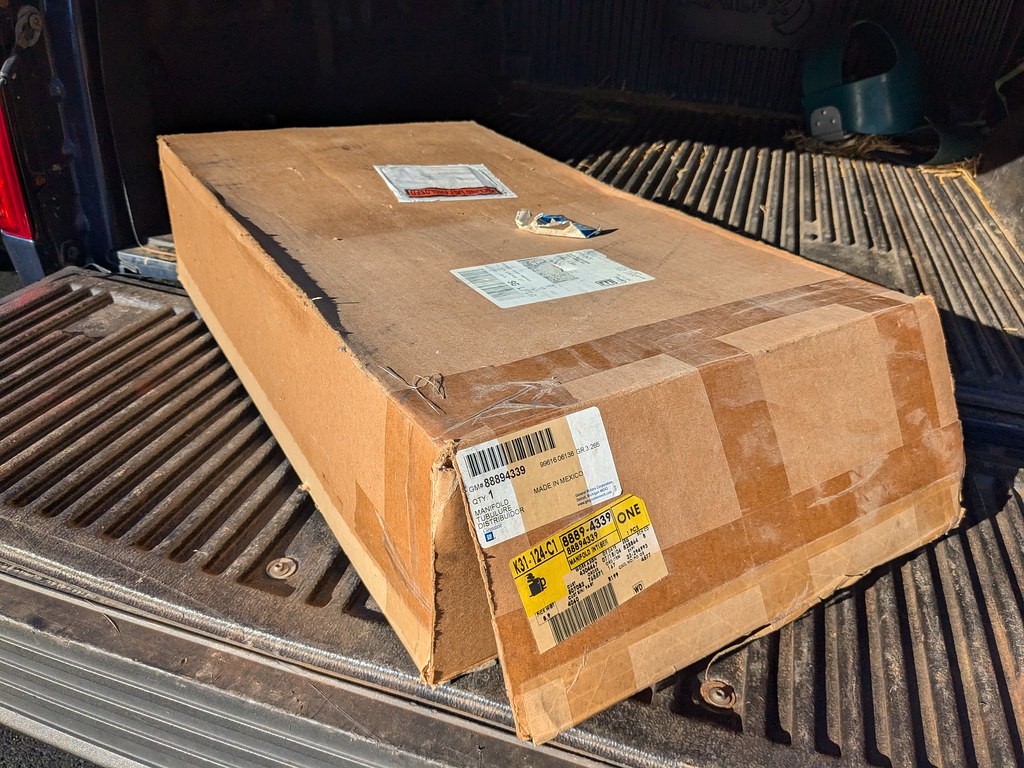
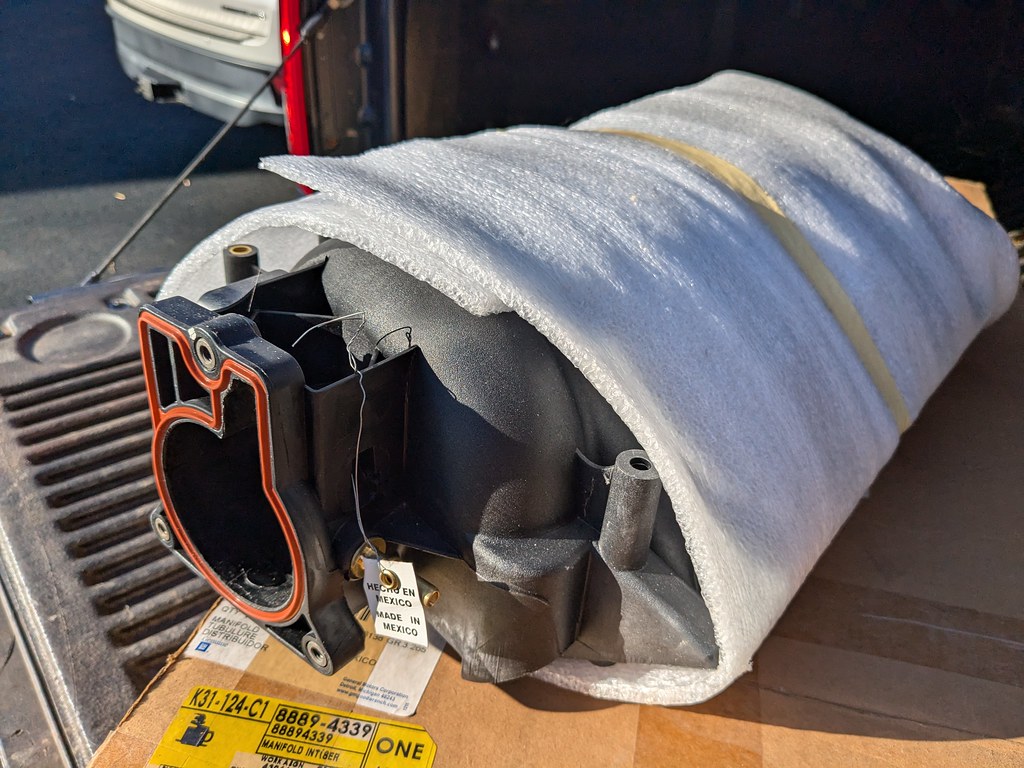
When I got home and took inventory of what all I had picked up. Brand new NOS LS6 intake manifold, brand new NOS SLP Headers with Y pipe for 98-02 LS1 cars, SLP Loudmouth exhaust for 4th gen, NOS front and rear Bilstein shocks with Eibach springs, Ported 853 LS1 heads, Hypertech LS1 tuner, brand new Actron Scanner, bunch of misc. gaskets, Gen3 LS ARP head studs, complete LS1 rocker set, factory push rod set, pair of SLP 3" high flow cats, and a few books/manuals for 2000 Fbody Cars. It also came with a supposedly new GM ASA cam, but wasn't greased when he stored it and it was severely rusted. Overall was blown away with how many parts and the best part is they were all stored in a dry basement.


That intake was probably the coolest find. NOS intake from 2006!!


SLP Headers


The guy told me that he just wanted to get rid of everything at once, so he didn't even care if I resold them all. So with that in mind, I knew that most of the parts didn't fit my application so I was going to move them. I listed several parts right away with what I felt were appealing prices recoup some of my money. In a few days the shocks/springs sold for $300, and then the next day the scanner sold for $100. At this point, I was almost to the point where I had free parts which is probably the coolest thing. I also love to barter, so I put several feelers out there for items that I'd like to have. I found a guy who swapped me even for the SLP headers and Y pipe for a pair of fresh LS3 821 heads with lightweight valves. Not sure what I'm going to do with them, but they are very clean and came with the rockers/stands/factory yellow valve springs.


After a bunch of thought, I realized that I didn't want to run the LS6 intake so I listed it locally on FB marketplace. I realize I could have likely held out for more money, but I listed it and had a cash offer within a day for $500 and took it. At this point, I'm in the positive for $300 bucks with a bunch of parts left to sell or trade. Score!!

I didn't have many bites on the ported LS1 heads, but had in the listing that I'd trade for LS parts. One guy offered to trade me a 6.0 for the ported heads plus a few extra parts (stock push rods, yellow valve springs, valley cover and LS1 rockers) that I was going to use. After talking with him more, he ended up giving me a single 823 head and a TBSS intake w/ TB too! Done deal, made that happen and got it back home. My youngest son had an absolute blast helping me tear it down and inspect. It had one bad piston with some scoring. After I got it torn down we also found that it needs cam bearings. I got the bad piston out and then used my dingleball and the scoring isn't very deep at all and would probably be good to send. I'm probably going to get a new piston put a cylinder head on and do a compression test to see what it looks like.


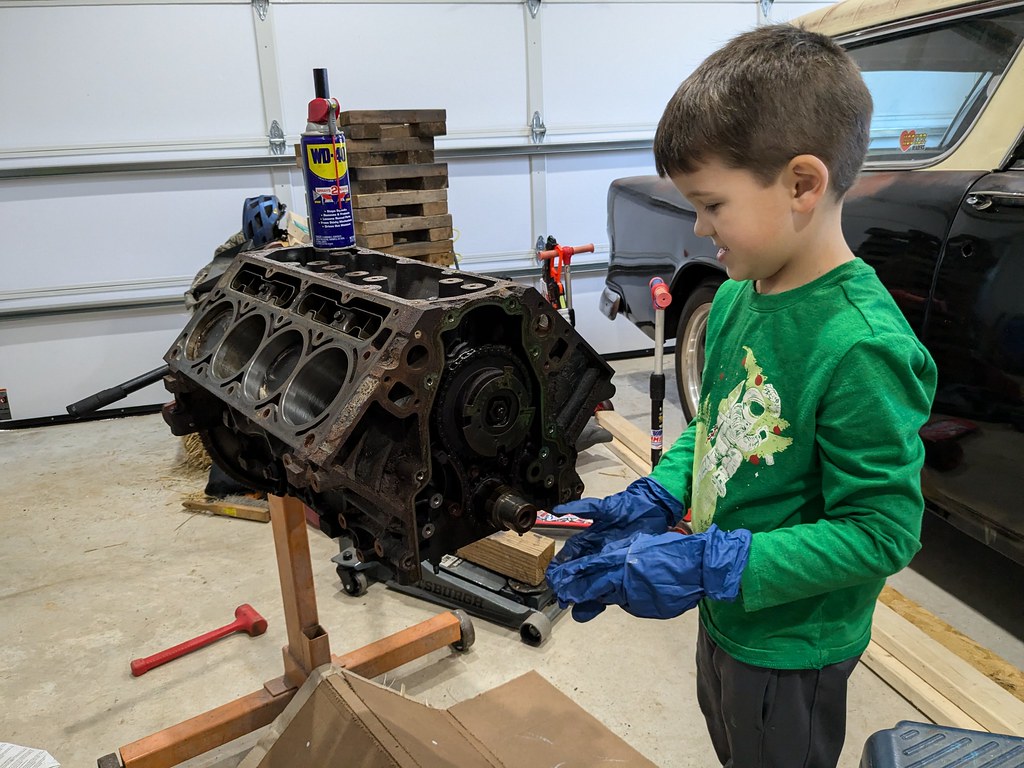
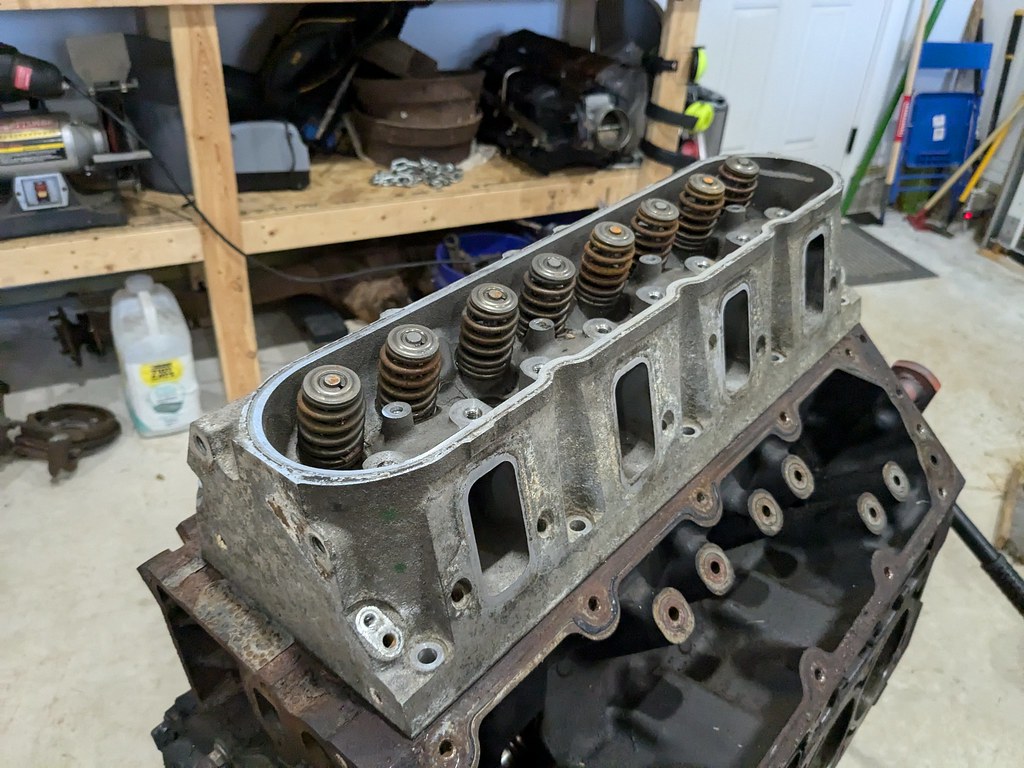
Bearings look good and the other cylinder walls cleaned up very nicely.


No idea what I'm going to do with the engine right now, but I'll try to collect parts to put this engine together. Maybe I'll pick up another project or roller and swap it into.

Then when we were visiting family in NY, I found an ad for a Dorman 615-901 LS2 intake for $350. For those that don't know, these allegedly use the old FAST 90 lower intake manifold with Dorman's upper intake. There are many guys out there with documented flow bench tests where these will outperform LS6/TBSS manifolds by a good bit under .600" lift on a flow bench and have a 90mm TB opening. I remember when they first came out and were about $350 bucks which was a good bargain, but are now selling for over $1k online. For that price you may as well buy a real FAST intake, but they used to be a great budget intake. I picked it up for $250, and I'll plan to use it on my Nomad. I need to buy some new fuel rails since these won't work with my LS3 style injectors. I'll do some light port cleanup since there is some flash where the two half's are glued together. After all that, I'm still $50 in the green and still have a few more parts that I can sell/trade.


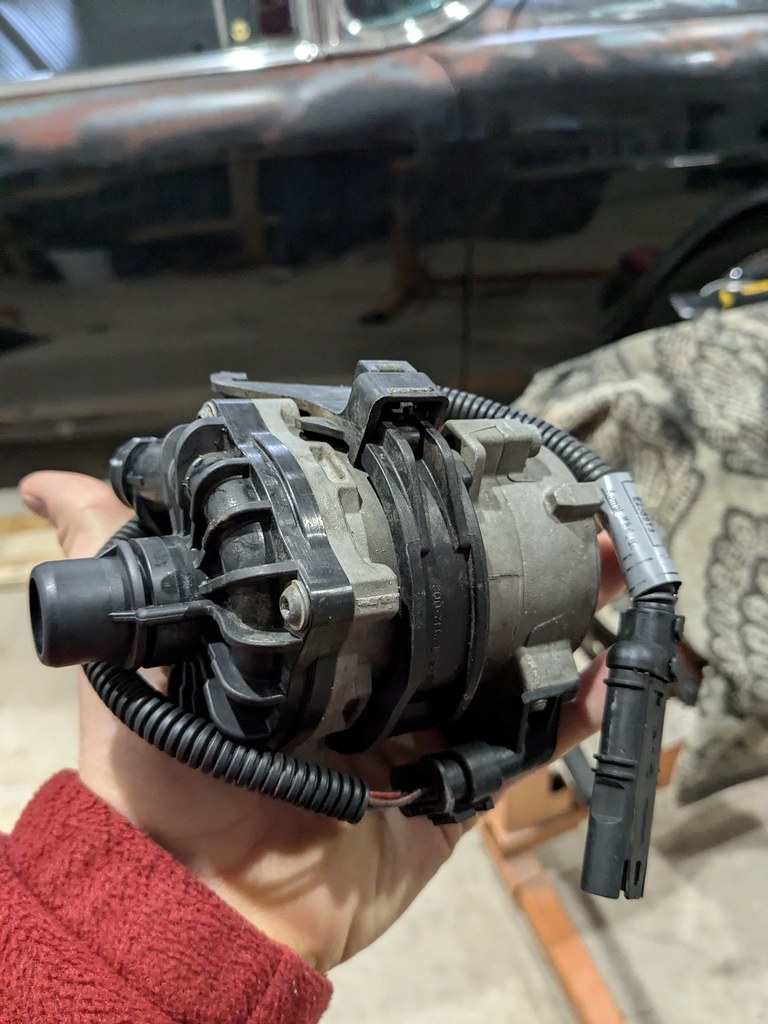
I'm also starting to collect parts for my Turbo swap. I decided to go with an A2W intercooler since they are more efficient and more flexible. That way I could keep my radiator and fan assembly but add a heat exchanger instead of having to change my whole radiator to account for a large A2A intercooler. First part was a CWA 50 Pierburg pump off of an X5 BMW which is the same pump I used on my Camaro. It worked flawlessly and flows a ton of water/coolant.


That's all for now, but I do have another deal in the works for some 9" parts. I picked up a 9" a while ago that is the right width for a 55-57 Chevy, so I'll just need to buy a set of 3.25 gears and I'll have everything I need to swap that into my car. That's probably the next project because I want to have my driveline ready for when I add boost. The factory rear that's under my car is in good condition, so I'd rather not blow it up. It will be worth something to someone.

Cheers,
Ryan

1976 Trans Am LS1 and much more...SOLD
1968 Camaro LSA, T56 Magnum, and much more...SOLD

Current Project: 1955 Nomad LC9, 4L80e, C5 brakes and etc...

roadking77

  • Oracle Forum Member
  • *
  • Posts: 13658
Re: Madaguy 1955 Nomad Build
« Reply #308 on: January 10, 2025, 06:02:06 PM »
Great update. I love the way you wheel and deal parts, you seem to have a knack for it. You have a great understanding of these 'new' motors and what they need to work which is such a big part in finding the stuff.
Finished!
77 T/A - I will Call this one DONE!
79 TATA 4sp-Next Project?
79 TATA - Lost to Fire!
86 Grand Prix - Sold
85 T/A - Sold
85 Fiero - Sold
82 Firebird - Sold
'38-CZ 250
'39-BSA Gold Star
'49-Triumph 350
'52-Ariel Red Hunter
'66-BSA Lightning
'01-HD RoadKing

ryeguy2006a

  • Oracle Forum Member
  • *
  • Posts: 6117
Re: Madaguy 1955 Nomad Build
« Reply #309 on: January 15, 2025, 01:45:39 PM »
After all of the work that I've done on the car with many of the parts coming from a local junkyard, I thought it was only right to drive up and show the owner the car. He was so stoked to see it and took a few pictures for his wall. He was a little surprised when he looked under the hood to see an LS and asked a bunch of questions about it. Afterwards he showed me his wall of fame and said that he's printing off one of the pictures to put on his wall. I had him take one with my phone so I had a copy. I looked around while I was there but didn't find much of interest, but it's always cool going there.


I've been meaning to dig into this 9" that I bought a while ago, and finally ripped into it. It's a 3.00 gear open differential just like the tag said, and after opening it up it looks like it may be the first time since 1964 that it has been open. The oil in it looked like crude oil. All of the gasket flange surfaces still have the machining marks on them. I found a guy locally who's going to trade me a factory Trac-Lok center that has 28 splines that will be a direct swap for this rear. I'm going to just clean it up and put it back together with the new posi center section. I haven't decided if I'll use it or re-sell and try to find a nice 8.8 rear. The passenger side axle slid right out, but the driver's needed the old slide hammer.


Last car update is I found a listing on eBay for a factory 30k mile Throttlebody off of an LS7. I put a high bid of $75, and the bidding ended at $64 bucks, score! The 87mm interfered with the intake, so I couldn't use it without a spacer. The LS3/LS7 throttlebodies work without an issue. It even came with the factory bolts, which is a nice bonus.


Next is a slight departure from the project, but is pretty cool. I've always wanted a golf cart to cruise around my yard and neighborhood, but never was able to find one priced right with the options I wanted. I found this one that had both the folding rear seat and a lift kit. The only issue is the motor was missing. But I had read that there are options out there to swap in other motor platforms, so I grabbed it. It was pretty dirty and had definitely been sitting for a while, but had great bones.


Pretty much just the engine was missing, with all of the other components and wiring. Great base to start with.


I spent an hour or so scrubbing it up before I brought it inside. It cleaned up a lot better than I thought, which is great because I may not end up painting it now.


After doing some research online I found a company called Vegas Carts, and they sell components to "big block" swap these carts with anything from 420cc up to V-Twin's. After searching around the internet, I came across a guy selling a GX390 Honda engine, but looked like it had been worked over. Just so happened he was about 5 miles away, so I ran over there and he was able to fire it up for me and it ran great. I picked it up for a very reasonable amount.


After a search online, I found a number to the builder EES and gave them a call. Turns out they build these engines for a SPEC racing class and tune these little 11-13 HP motors up to around 19-20 HP! He said based on what I was telling him it was the 19HP version. I was concerned that this may be a little too much for the cart considering I really only want it to tool around my yard and go to the fishing pond, but he said that he has built many of these engine's for guys doing exactly what I am. He said it will run and idle just like stock, but have a little more at bottom end than a stock Honda engine would. Pretty stoked. I'm going to make my own engine mount, but I did buy the specialty drive clutch from Vegas Cart. They have a nice machined pulley that the other company's don't have which will allow me to use a stock starter/generator so it will start and stop just like a regular golf cart.

I'm hoping that over the next month or so to put this cart together and then order the rest of the parts to get my 9" swapped into the Nomad. Once the new rear end is installed, I can focus my attention towards adding boost. I'm trying to do everything in small stages so that I can avoid having the car down for more than a week or so.

Cheers,
Ryan

1976 Trans Am LS1 and much more...SOLD
1968 Camaro LSA, T56 Magnum, and much more...SOLD

Current Project: 1955 Nomad LC9, 4L80e, C5 brakes and etc...

roadking77

  • Oracle Forum Member
  • *
  • Posts: 13658
Re: Madaguy 1955 Nomad Build
« Reply #310 on: January 15, 2025, 04:06:21 PM »
C'mon man, Ryan you are letting me down, I figured you would be putting an LS motor in that golf car!
Finished!
77 T/A - I will Call this one DONE!
79 TATA 4sp-Next Project?
79 TATA - Lost to Fire!
86 Grand Prix - Sold
85 T/A - Sold
85 Fiero - Sold
82 Firebird - Sold
'38-CZ 250
'39-BSA Gold Star
'49-Triumph 350
'52-Ariel Red Hunter
'66-BSA Lightning
'01-HD RoadKing

FormTA

  • Oracle Forum Member
  • *
  • Posts: 5736
  • Life is short, have fun, Drive a T/A
Re: Madaguy 1955 Nomad Build
« Reply #311 on: January 19, 2025, 07:52:00 AM »
Cool project! Keeping busy I see. You're about to get cold there aren't you? Well, colder than normal but you're used to it.
79 Trans am low buck LS swapped
79 Formula 301 (Work in progress)
67 RS Camaro (waiting it's turn)
69 Dodge charger on late model charger chassis
49 Ford F1 on a 2003 Chevy ZR2 Chassis (current project)
Names, Luke. If I hear anyone telling me they're my father....

ryeguy2006a

  • Oracle Forum Member
  • *
  • Posts: 6117
Re: Madaguy 1955 Nomad Build
« Reply #312 on: February 27, 2025, 08:23:07 AM »
Took a little break from the car and focused on some house projects and basketball games. I've been slowly buying some parts and getting ready for the next stage of the project. I traded some parts a while back for a LY6 shortblock that needed a little love. I pulled all the pistons/rods, descaled the block and ran my ball hone through it about 30 times each. I have a flat plate of aluminum and some 600 grit sandpaper that I used to clean off the gasket surface, then after washing multiple times sprayed it with some engine enamel. Turned out pretty good IMO. I had a buddy sell me a complete set of LS2 flat top pistons for a really good price and they came with new rings with very low mileage. It needed cam bearings and I got those installed a few days ago. It's now ready for reassembly and once that's done I'll list if for sale. Once it sells, I'm going to pull the trigger on a Quick Performance 9". I was going to try and make the other 9" work for me, but at the end of the day the only thing that I want to keep is the housing, so I'm going to send that one down the road as well.


The other thing that was keeping me busy was my golf cart project. It took me a while to figure out how I wanted to build the engine cradle, but once I did it came together pretty quickly. They sell a kit through Vegas Carts, but what I didn't like was it deleted the factory rubber engine mounts. My design keeps the mounts and still keeps it low enough to fit under the seat.


Round one determined that I couldn't have my bar go straight across since it needed clearance for the belt. The solution was to create a notch, which I think turned out pretty good.


After many test fits, here is the final product with the engine bay painted.


I still need to wire up the external ignition switch, rebuild the fuel pump, add an external choke and flush the gas tank. After that, it will be good to go fishing! I want to add some fishing racks on the roof so that we can go back and forth to the pond near our house.

I recently made a sizeable purchase at Summit Racing which included some misc. fuel fittings to get my Dorman LS2 intake installed as well as some new 2" drop springs from Real Deal Steel. They seem really well built, but I think that given how worn my springs are it will actually raise my ride height in the rear. Hoping to get them installed soon as well. In addition to the fuel fittings for the intake I also grabbed a flex fuel sensor so I can run blended fuels. We have e85 at several gas stations right near me, so I might as well take advantage of it.


I took advantage of my son's 3D printer and found a file on Thingiverse.com for a bracket to hold the sensor. Thanks whoever uploaded it! It fits perfectly and uses the factory clip location to lock into place. Great design.


Part of the parts collection I've been doing over the last month was finding some sun visors. Want to thank Crawdad55 from Trifive.com for sending these to me. He basically gave them to me and they are incredibly good condition for being original. Play to dye them black to match the rest of my interior. He also included the swivels and mounting screws. He said they came off of a car he parted in the early 90s. Amazing.


Lastly, I was thinking about longer road trips and realized it would be a good idea to carry a spare tire. Trouble is finding one large enough to fit over my big brakes. After searching around I found that the certain models of Cadillac CTS have 18x4" spare tires which is perfect! The only thing that is a very small issue with them is that the bolt pattern is 5x120mm vs the 5x120.65mm(5x4.75"). I'm not concerned at all about that, but wanted to mention if someone wanted to copy. I ran BMW wheels on my 1968 Camaro for 5 years with zero issues. But none the less, it fits great in the spare tire well, and I think that it will also allow me room to build a recess panel to mount my battery down there too. I'd like to get the battery off the firewall and in the rear if I can. We'll see.


I'm getting excited to work on the car again and continue working the bugs out of the car and making it better. Before the weather fully turns and we are back in driving season again, I need to get the rear springs swapped in and a proper front end alignment done. I still think I want to cut 1/2 coil out of the front so that's on my list. To be kind to the alignment guy, I'm going to keep the inner fenders off, but once the alignment is done I want to install those. Hoping to get that done in the next few weeks.

Cheers,
Ryan

1976 Trans Am LS1 and much more...SOLD
1968 Camaro LSA, T56 Magnum, and much more...SOLD

Current Project: 1955 Nomad LC9, 4L80e, C5 brakes and etc...

rkellerjr

  • Oracle Forum Member
  • *
  • Posts: 6779
  • When you turn your car on does it return the favor
Re: Madaguy 1955 Nomad Build
« Reply #313 on: February 27, 2025, 08:27:52 AM »
Looks good Ryan, hope we get to meet up again this year and hang out.

roadking77

  • Oracle Forum Member
  • *
  • Posts: 13658
Re: Madaguy 1955 Nomad Build
« Reply #314 on: February 27, 2025, 01:47:26 PM »
Looking good. I always enjoy your updates. You make me feel like a slacker though!
Finished!
77 T/A - I will Call this one DONE!
79 TATA 4sp-Next Project?
79 TATA - Lost to Fire!
86 Grand Prix - Sold
85 T/A - Sold
85 Fiero - Sold
82 Firebird - Sold
'38-CZ 250
'39-BSA Gold Star
'49-Triumph 350
'52-Ariel Red Hunter
'66-BSA Lightning
'01-HD RoadKing

rkellerjr

  • Oracle Forum Member
  • *
  • Posts: 6779
  • When you turn your car on does it return the favor
Re: Madaguy 1955 Nomad Build
« Reply #315 on: February 27, 2025, 02:20:37 PM »
You make me feel like a slacker though!

Me too.

jonathonar89

  • Oracle Forum Member
  • *
  • Posts: 2511
    • Mark's Cars Inc.
Re: Madaguy 1955 Nomad Build
« Reply #316 on: March 09, 2025, 10:07:30 AM »
Where’s the golf cart thread haha.  Good stuff man.
Mark's Cars Inc.

https://markscarsinc.com

ryeguy2006a

  • Oracle Forum Member
  • *
  • Posts: 6117
Re: Madaguy 1955 Nomad Build
« Reply #317 on: March 11, 2025, 07:36:45 AM »
I'm not sure it's worth my time to start a golf cart thread since it's pretty much as done as it's going to be haha.

Not a huge update as I've been sort of busy just collecting new parts and selling some ones I'm not going to use. Last week I finished up the 6.0 that I rebuilt and listed it for sale. I may have let it go too cheap because someone came and bought it within 24 hours of posting. It really cleaned up well and will make a great engine for that guy. He's going to put an LSA supercharger on it which is perfect because I gapped it for boost. Looked pretty before it left.


Once that sold, I decided to pull the trigger on a Quick Performance 9" rear. I ordered it with 35 spline axles and the GM flush mount ends so that I can run the tried and true LS1 rear brakes. Hopefully it will be shipped in the next few weeks. I'm going to order an assembled unit through Speedway once I get the word on shipping the housing and axles. I also ordered a pair of new drop springs from Real Deal Steel because the spring on the passenger side is almost flat. It will likely raise my ride height because of how worn the stock springs are, but I'll run a drop block to get it back to where it is now. They shipped just like this with no box. I was a little surprised, but they seem to have made it safely. We'll see once I open them.


I also grabbed a few fuel fittings that I needed to run the Dorman LS2 intake. One is made by Fragola for fuel rails. It's a -8 ORB on one side, then 90* to 3/8" GM quick connect on the other side to connect to my Nylon fuel lines. I'll need to tap into the lines I ran though to add the flex fuel sensor as well.


I was checking Facebook marketplace this weekend as I usually do and came across a guy selling an upgraded CTSV fuel pump and Vaporworx fuel module for a great price. I only needed the fuel module, but bought it all because I knew that I could either use the pump or sell. The guy was selling because he was going to the next level with his G8 and swapping to a 416 stroker with Kong 2650 which will require a triple pump setup. Good news for me, because that was the last piece to my fuel puzzle and one step closer to Turbo Time.


I'm trying to keep the car drivable as long as I can, so I haven't torn into it yet. In the short term I want to get the inner fenders repaired, so that I can install them and move the battery from the firewall to the driver's side core support. I want to give more room for the post turbo exhaust and more room around the valve covers. I'll also be putting the A2W intercooler on the passengers side down low, so I want to keep that side clear. Once I have all the components for the 9", I'll also need to measure for a new driveshaft from PEM. It will be nice once the new rear and upgraded driveshaft are installed so I shouldn't have to worry about breaking the rear!

Cheers,
Ryan

1976 Trans Am LS1 and much more...SOLD
1968 Camaro LSA, T56 Magnum, and much more...SOLD

Current Project: 1955 Nomad LC9, 4L80e, C5 brakes and etc...

N PRGRES

  • Oracle Forum Member
  • *
  • Posts: 1296
Re: Madaguy 1955 Nomad Build
« Reply #318 on: March 11, 2025, 08:33:22 AM »
I wish I was half as innovative as you are
Dave

81 Trans Am w/73 400.

roadking77

  • Oracle Forum Member
  • *
  • Posts: 13658
Re: Madaguy 1955 Nomad Build
« Reply #319 on: March 12, 2025, 06:37:49 AM »
"Its Turbo Time"    :-)
Finished!
77 T/A - I will Call this one DONE!
79 TATA 4sp-Next Project?
79 TATA - Lost to Fire!
86 Grand Prix - Sold
85 T/A - Sold
85 Fiero - Sold
82 Firebird - Sold
'38-CZ 250
'39-BSA Gold Star
'49-Triumph 350
'52-Ariel Red Hunter
'66-BSA Lightning
'01-HD RoadKing

Re: Madaguy 1955 Nomad Build
« Reply #319 on: March 12, 2025, 06:37:49 AM »
You can help support TAC!