Author Topic: 1968 Camaro Resto-mod LS3/6 speed; Project Penny Pincher  (Read 18838 times)

ryeguy2006a

  • Oracle Forum Member
  • *
  • Posts: 6038
Re: 1968 Camaro Resto-mod LS3/6 speed; Project Penny Pincher
« Reply #80 on: August 12, 2021, 05:34:34 AM »
I can't wait to see your car in person either. Let's meet up soon! The fan C7 fan is a brushless 600 watt Spal fan that GM uses in conjunction with their factory ECU and will only work with PWM. Most if not all of the OEMs are now using the brushless PWM fans in conjunction with a PWM signal. I'm not sure if I mentioned it before either, but it has some internal programming for a "soft start" so that there isn't a spike to the system when if first starts up. Running the fan at 100% it is very loud, but anything below 60% I can't hear when the car is running. Unless I'm out of the car watching the fan spin, I can't tell it's even on. Although I know it's working because the temps stay in check.

With a typical fan setup you cannot use the PWM because the Bosch style relay's are not able to turn on and off quick enough to effectively work. However from what I understand, you can use any fan, but need to swap out the Bosch style relay for a Solid State Relay which has no internal moving parts and will work with PWM. Then you could assign a duty cycle so that the fans aren't strickly on or off.

1976 Trans Am LS1 and much more...SOLD
1968 Camaro LSA, T56 Magnum, and much more...SOLD

Current Project: 1955 Nomad LC9, 4L80e, C5 brakes and etc...

sensei451

  • Active Forum Member
  • *
  • Posts: 218
Re: 1968 Camaro Resto-mod LS3/6 speed; Project Penny Pincher
« Reply #81 on: August 19, 2021, 07:29:53 PM »
I have this "spike" problem with my 2000 fbody fans.. they are wired as fan1 full speed as low from pcm, both fan full speed as high from pcm. Which is not the intended wiring by the way.

Thus, when low comes on, engine idle speed dips for a moment.

However the setup works surprisingly well with the original 81 radiator even in florida heat. In fact, high has never been on  :shock:

Not sure why I am polluting your thread with this, just wanted to check in and say hi.


ryeguy2006a

  • Oracle Forum Member
  • *
  • Posts: 6038
Re: 1968 Camaro Resto-mod LS3/6 speed; Project Penny Pincher
« Reply #82 on: August 20, 2021, 10:37:53 AM »
That could be a sign of a weaker alternator. My C7 fans will draw up to 50 amps at full load and I don't notice any drop on voltage.

Always good to hear from you my friend. Glad the T/A is running good for you and keeping cool temps.

1976 Trans Am LS1 and much more...SOLD
1968 Camaro LSA, T56 Magnum, and much more...SOLD

Current Project: 1955 Nomad LC9, 4L80e, C5 brakes and etc...

ryeguy2006a

  • Oracle Forum Member
  • *
  • Posts: 6038
Re: 1968 Camaro Resto-mod LS3/6 speed; Project Penny Pincher
« Reply #83 on: September 08, 2021, 01:16:39 PM »
Not a ton of progress, but I swapped out my 255-45-18 tires for some Michelin ps2 275/35r18. I got them pretty cheap and they have helped slightly with traction. I got them for a really good deal to check for fitment, but I'd really like to go with a 275-40-18 eventually.


They didn't help that much though with traction haha.


I also picked up a set of 7.425" pushrods to see if more lifter pre-load will help to reduce the LS sewing machine sound. I know its very common with LS motors and aftermarket cams, but I want to try and reduce it if possible. Hopefully can swap those out over the next few weeks.


I also picked up this little tab for the ebrake switch. After I install that, I'll be able to hook up the light on my dash.


Cheers,
Ryan

1976 Trans Am LS1 and much more...SOLD
1968 Camaro LSA, T56 Magnum, and much more...SOLD

Current Project: 1955 Nomad LC9, 4L80e, C5 brakes and etc...

ryeguy2006a

  • Oracle Forum Member
  • *
  • Posts: 6038
Re: 1968 Camaro Resto-mod LS3/6 speed; Project Penny Pincher
« Reply #84 on: September 20, 2021, 07:11:08 AM »
I swapped out the pushrods Friday night and took some measurements. I used my adjustable pushrod checker and came up with the same measurement that I did when I built it originally. Zero lash comes out to 7.325". So with my 7.400 pushrods I come up with a 0.075" preload which is right about where the stock should be. BTR calls for a 0.100" preload, so I was right swapping out to the 7.425" pushrods. Glad to see that the inside still looks really clean. In addition to swapping out the pushrods I was tracking down a small oil leak. Good news is that the valve cover gasket had just pushed outside of the groove on the driver's side. Easy fix.


After that was all done, I took the car out on Saturday and it was slightly quieter, but not the results that I was hoping for. I'm guessing that it may not be the engine at this point, but maybe the design of the headers. I've heard various reports of different header manufactures where people have loud or quiet valves depending on that. I'm hoping to swap out my shorty headers at some point for some long tubes so maybe that will change things. I'm probably being particular because whenever I drive it I'm listening for it. Other people that have ridden in the car say it's not very noticeable.

Also Friday night, I got my parking brake wire hooked up and the new paddle installed. This was super easy and took me all of about 10 minutes. Nice to have a dash indicator now.


I'm hoping to get my new Astro Vents installed soon too. Just plugging away at the little things and enjoying driving the car.

Cheers,
Ryan

1976 Trans Am LS1 and much more...SOLD
1968 Camaro LSA, T56 Magnum, and much more...SOLD

Current Project: 1955 Nomad LC9, 4L80e, C5 brakes and etc...

Re: 1968 Camaro Resto-mod LS3/6 speed; Project Penny Pincher
« Reply #84 on: September 20, 2021, 07:11:08 AM »

5th T/A

  • Oracle Forum Member
  • *
  • Posts: 1373
Re: 1968 Camaro Resto-mod LS3/6 speed; Project Penny Pincher
« Reply #85 on: September 20, 2021, 01:56:51 PM »
Ryan,

I think you may be to particular or sensitive to the noise. A comparison might be like when you paint a car and 99% of it is perfect but you know of this one spot that is not. Your eye is drawn to that one spot every time you look at the car, while most other people never notice the flaw. I don't know if this true in your case but most cars with headers tend to be a little more noisy and mechanical sounding. I personally wouldn't put long tube headers on, that might make it worse.
1980 T/A with a Pontiac 461

Gone but not forgotten;
1973 T/A 455
1975 T/A 400
1978 T/A W72
1982 T/A cross fire injected

Two wheel toys;
2014 Harley Ultra Classic Limited
2013 Honda CB1100
2010 Yamaha Vmax
1982 Yamaha Seca 750

ryeguy2006a

  • Oracle Forum Member
  • *
  • Posts: 6038
Re: 1968 Camaro Resto-mod LS3/6 speed; Project Penny Pincher
« Reply #86 on: September 22, 2021, 06:43:45 AM »
You're probably right, headers won't help. I've been thinking a lot about it and I think what I'm going to do is pull out my interior this winter and install a ton of sound deadening material. I think what's happening is the sound is resonating through the interior because it really shouldn't be as loud as it it. And while the interior is out I might as well install mini-tubs haha

1976 Trans Am LS1 and much more...SOLD
1968 Camaro LSA, T56 Magnum, and much more...SOLD

Current Project: 1955 Nomad LC9, 4L80e, C5 brakes and etc...

Nexus

  • Oracle Forum Member
  • *
  • Posts: 2040
Re: 1968 Camaro Resto-mod LS3/6 speed; Project Penny Pincher
« Reply #87 on: September 23, 2021, 08:57:22 PM »
Mini tubs eh?

More room for wider tires = better traction!!
Charlie

79 Esprit but like many, it will be a T/A clone
(22 years and counting but still have her)
http://transamcountry.com/community/index.php?topic=79648.0

ryeguy2006a

  • Oracle Forum Member
  • *
  • Posts: 6038
Re: 1968 Camaro Resto-mod LS3/6 speed; Project Penny Pincher
« Reply #88 on: September 27, 2021, 06:21:43 AM »
I might have to tuck the tailpipes in a different way, but I'm measuring 2" from the inside of my tire to the leaf spring. That is a lot of extra tire if you ask me. Not even sure I'd "need" to go with a 4 link with that much extra tire.

1976 Trans Am LS1 and much more...SOLD
1968 Camaro LSA, T56 Magnum, and much more...SOLD

Current Project: 1955 Nomad LC9, 4L80e, C5 brakes and etc...

ryeguy2006a

  • Oracle Forum Member
  • *
  • Posts: 6038
Re: 1968 Camaro Resto-mod LS3/6 speed; Project Penny Pincher
« Reply #89 on: September 27, 2021, 11:32:23 AM »
So I'll post up something that is a little interesting and a little embarrassing because I should have noticed it sooner. I'll start by showing my little quickie body work project. I've had some trouble ever since I built my car with some rubbing on the driver's side, which came to a head recently as I hit a road bump recently and my tire actually contacted the quarter. It wasn't serious damage thankfully, but it caused some paint damage when I hit it back in place. I'll fix this the right way this winter, but for now I had some Duplicolor color match rattle can paint that did a really nice temporary job. Just sanded it back a little with 400, then tapped it off, hit with primer and paint. Pretty pleased for a 20 min fix. Definitely not perfect, but it won't get any worse now.


When I was putting the wheel back on I started looking at that area and noticed that it seemed to be closer to the front than the rear. Then as I stepped back and got down I realized that the wheel wasn't centered in the wheel house. I didn't have tape measure right handy, but I checked and had two finger gap on the driver's side, and a loose 3 finger gap on the passenger at the front of the quarter. After I investigated further the rear axle had shifted forward at some point causing the wheel to not stay centered. I loosened up both the leaf spring pocket and the u bolts and made some adjustments and now it's the same on both sides. No idea how I didn't catch that sooner.

Before:


After:


Much better now!! I've driven it around and so far zero scrubbing.

I never drive the car at night, but I figured I should install the dome light. My son was interested in what I was doing when I was doing so I had him help me install it and cut the headliner. I also showed him how the circuits work. Probably forgot it already, but he was super interested at the time haha.


Best,
Ryan

1976 Trans Am LS1 and much more...SOLD
1968 Camaro LSA, T56 Magnum, and much more...SOLD

Current Project: 1955 Nomad LC9, 4L80e, C5 brakes and etc...

langss

  • Active Forum Member
  • *
  • Posts: 326
Re: 1968 Camaro Resto-mod LS3/6 speed; Project Penny Pincher
« Reply #90 on: September 27, 2021, 03:11:21 PM »
So I'll post up something that is a little interesting and a little embarrassing because I should have noticed it sooner. I'll start by showing my little quickie body work project. I've had some trouble ever since I built my car with some rubbing on the driver's side, which came to a head recently as I hit a road bump recently and my tire actually contacted the quarter. It wasn't serious damage thankfully, but it caused some paint damage when I hit it back in place. I'll fix this the right way this winter, but for now I had some Duplicolor color match rattle can paint that did a really nice temporary job. Just sanded it back a little with 400, then tapped it off, hit with primer and paint. Pretty pleased for a 20 min fix. Definitely not perfect, but it won't get any worse now.


When I was putting the wheel back on I started looking at that area and noticed that it seemed to be closer to the front than the rear. Then as I stepped back and got down I realized that the wheel wasn't centered in the wheel house. I didn't have tape measure right handy, but I checked and had two finger gap on the driver's side, and a loose 3 finger gap on the passenger at the front of the quarter. After I investigated further the rear axle had shifted forward at some point causing the wheel to not stay centered. I loosened up both the leaf spring pocket and the u bolts and made some adjustments and now it's the same on both sides. No idea how I didn't catch that sooner.

Before:


After:


Much better now!! I've driven it around and so far zero scrubbing.

I never drive the car at night, but I figured I should install the dome light. My son was interested in what I was doing when I was doing so I had him help me install it and cut the headliner. I also showed him how the circuits work. Probably forgot it already, but he was super interested at the time haha.


Best,
Ryan
It doesn't matter if your Son remembers or not, but I can assure you He won't forget the time he spent with you. My Grandfather was a Mean Nasty Old Man, but I clearly remember the one time he took the time to show me how Vise Grips worked. I still have those Vise Grips and used them where I worked.

Jack

  • Oracle Forum Member
  • *
  • Posts: 12429
  • 1971 Esprit TA Clone W72 1972 Formula 68 350 HO
Re: 1968 Camaro Resto-mod LS3/6 speed; Project Penny Pincher
« Reply #91 on: September 27, 2021, 06:51:11 PM »
Nice to see your son "helping"


Regards, Jack

5th T/A

  • Oracle Forum Member
  • *
  • Posts: 1373
Re: 1968 Camaro Resto-mod LS3/6 speed; Project Penny Pincher
« Reply #92 on: September 27, 2021, 07:43:03 PM »
Ryan,

Picture of your son testing the circuit is priceless!
1980 T/A with a Pontiac 461

Gone but not forgotten;
1973 T/A 455
1975 T/A 400
1978 T/A W72
1982 T/A cross fire injected

Two wheel toys;
2014 Harley Ultra Classic Limited
2013 Honda CB1100
2010 Yamaha Vmax
1982 Yamaha Seca 750

ryeguy2006a

  • Oracle Forum Member
  • *
  • Posts: 6038
Re: 1968 Camaro Resto-mod LS3/6 speed; Project Penny Pincher
« Reply #93 on: September 28, 2021, 06:16:30 AM »
I remember when my dad would let me do stuff like that and it always stayed with me. Trying to give my boys the same experience.

1976 Trans Am LS1 and much more...SOLD
1968 Camaro LSA, T56 Magnum, and much more...SOLD

Current Project: 1955 Nomad LC9, 4L80e, C5 brakes and etc...

ryeguy2006a

  • Oracle Forum Member
  • *
  • Posts: 6038
Re: 1968 Camaro Resto-mod LS3/6 speed; Project Penny Pincher
« Reply #94 on: October 04, 2021, 06:57:22 AM »
I've been looking to update my seats for a long time, but have been getting along find with the stock 53 year old seats for 5 years now. I guess the biggest reason for me keeping the seats (other than my budget), is that the seats were born with this car. They are far from perfect, but are in much better shape than most after that long. That said, I had been thinking of updating my seats recently and sent a message to my buddy Don. He has a 1967 Camaro that he pulled these out of in favor of some dedicated racing seats since his car is more oriented towards Auto X. He gave me a deal on the seats, first gen brackets and a matching rear seat cover. He lives a little over 2 hours from me, but he was going to be at an AutoX event this past weekend and said he'd bring them along. I was considering going to the event anyway, so it was a great opportunity to take the car out and the weather was a beautiful upstate, NY fall day. Changing leaves and all. Unfortunately I didn't grab any pictures...

Anyway, drove up to the event and swapped the seats right in the parking lot haha. My brother-in-law rode up with me and we had them swapped out in about 20 mins. Got to watch Don and the others race a few times and then hit the road back home. Next year I'll get my car out to an event. It took me most of the summer to dial in the car, but it will be ready for next year. Here's the car loaded up with the new seats installed and the old seats in the back. Driver's seat fit in the trunk and the passenger had to go behind my seat.


We had a great ride home, but after I filled up I smelled some raw gas. I didn't think much of it because I had done a few hard accelerations and figured it was coming out of the filler neck or something. But then we got about 20 mins from home and it got interesting. Was cruising along, then all of a sudden my wideband started flashing yellow/red on my 3.5" screen and it died. Tried cranking it over and nothing. Fuel pressure is only reading about 15 psi?? I got the car pulled over to the side of the road then after a little troubleshooting, I tried it again and it went right back to 43psi where I have it tuned for. That was strange??

Ran fine, but I went easy on it. Then after I dropped off my BOL, I was about a mile from the house and it got bad. It would only build about 10-25 psi, and wouldn't stay consistent. I was thankfully able to limp the car home. I haven't had time to diagnose the issue, but I'm leaning towards bad fuel pumps or possibly a cracked fuel fitting on the assembly which is very common on the CTS-V pumps. I'm not happy about the fueling issue, but I will say that without the Terminator X system I would have had to get a tow truck. What is simply amazing about this system is because of the learning features, it added 50% fuel across my fuel tables which enabled the car to run enough to get me home. I was already thrilled with the ECU/software already, but for me this was just amazing. I can only imagine the many other situations where this system could save engines by it's learning capabilities.

After I got home, I unloaded the car and then grabbed some pictures of the seats. I'm in love with them, and they look right at home. Love the bolstering and how much more connected I feel to the car. You feel so much more planted and even the clutch engagement feels more solid now. Very pleased! Thanks Don.


I need to do a little tweaking on the seats because they seem to be interfering with my seat belt retractor. I had to pop off the little covers so that I could get them to fit and slide without hitting. I'll address that soon.


The other big win is that the seats allow me to have more leg room, while keeping my son's seat at the same location! I think that if I could find a different car seat for him, we would both be much more comfortable.


I need to dig into the issue with the fuel pump because I'd really like to do so cruising this fall. I hooked up the heater in the car this spring so that I could drive it later into the fall! I'm hoping it is a simple fix, but we will have to see.

Cheers,
Ryan

1976 Trans Am LS1 and much more...SOLD
1968 Camaro LSA, T56 Magnum, and much more...SOLD

Current Project: 1955 Nomad LC9, 4L80e, C5 brakes and etc...

Re: 1968 Camaro Resto-mod LS3/6 speed; Project Penny Pincher
« Reply #94 on: October 04, 2021, 06:57:22 AM »

scarebird

  • Oracle Forum Member
  • *
  • Posts: 1900
  • Former brake guy
Re: 1968 Camaro Resto-mod LS3/6 speed; Project Penny Pincher
« Reply #95 on: October 04, 2021, 08:20:08 AM »
One of the outlet fittings for my fuel pump failed one day - a Google search of Russell Fuel fittings is not a happy adventure.

ryeguy2006a

  • Oracle Forum Member
  • *
  • Posts: 6038
Re: 1968 Camaro Resto-mod LS3/6 speed; Project Penny Pincher
« Reply #96 on: October 04, 2021, 12:17:34 PM »
If you are referring to those fittings that adapt the GM quick connect to AN that use the plastic retainers, yes, they are prone to leaking. Bad news. I have an adapter that is a GM quick connect female/male fitting that gives me a 1/8" NPT plug for my PWM module, but it's designed well and has a captured retaining ring. Hopefully I'll get some time to diagnose it. I'll make sure to update the thread. If the fitting on the fuel pump hat is broken, I'll probably upgrade to a billet aluminum hat that's made by a company called ALM Performance. But I'll have to hold off until later since that kit is $310 bucks.

1976 Trans Am LS1 and much more...SOLD
1968 Camaro LSA, T56 Magnum, and much more...SOLD

Current Project: 1955 Nomad LC9, 4L80e, C5 brakes and etc...

scarebird

  • Oracle Forum Member
  • *
  • Posts: 1900
  • Former brake guy
Re: 1968 Camaro Resto-mod LS3/6 speed; Project Penny Pincher
« Reply #97 on: October 04, 2021, 01:45:05 PM »
that is the one: Push-Lok to AN.

langss

  • Active Forum Member
  • *
  • Posts: 326
Re: 1968 Camaro Resto-mod LS3/6 speed; Project Penny Pincher
« Reply #98 on: October 05, 2021, 08:03:20 AM »
If you are referring to those fittings that adapt the GM quick connect to AN that use the plastic retainers, yes, they are prone to leaking. Bad news. I have an adapter that is a GM quick connect female/male fitting that gives me a 1/8" NPT plug for my PWM module, but it's designed well and has a captured retaining ring. Hopefully I'll get some time to diagnose it. I'll make sure to update the thread. If the fitting on the fuel pump hat is broken, I'll probably upgrade to a billet aluminum hat that's made by a company called ALM Performance. But I'll have to hold off until later since that kit is $310 bucks.
Since I'm light years away from what you have accomplished, I had to see what $310 got you....Well all I can say is "Buy Once, Cry Once"....Its sad that its hidden and nobody but "You" will ever get to see it, but judging buy the notes on what it replaces, and how many different applications, I think its an idea whose time has arrived.

ryeguy2006a

  • Oracle Forum Member
  • *
  • Posts: 6038
Re: 1968 Camaro Resto-mod LS3/6 speed; Project Penny Pincher
« Reply #99 on: October 05, 2021, 11:11:03 AM »
Thanks LangSS. The way that I look at it, I got extremely lucky because in the Penny Pincher fashion the majority of the parts on my car were used. Everything came together better than I'd hoped for, and with no exception this fuel pump assembly was used. The pump is a CTS-V dual pump which retails for around $966, plus tax and shipping at Rock Auto. I was able to score one on FB marketplace for $150. So even with the upgraded fuel hat, I'll be half of a new one. I should probably just replace the fuel pumps while I'm in there, but I'll save that for another day. My handy dandy fuel pump access hatch has made this extremely easy!

1976 Trans Am LS1 and much more...SOLD
1968 Camaro LSA, T56 Magnum, and much more...SOLD

Current Project: 1955 Nomad LC9, 4L80e, C5 brakes and etc...

langss

  • Active Forum Member
  • *
  • Posts: 326
Re: 1968 Camaro Resto-mod LS3/6 speed; Project Penny Pincher
« Reply #100 on: October 05, 2021, 09:26:59 PM »
Thanks LangSS. The way that I look at it, I got extremely lucky because in the Penny Pincher fashion the majority of the parts on my car were used. Everything came together better than I'd hoped for, and with no exception this fuel pump assembly was used. The pump is a CTS-V dual pump which retails for around $966, plus tax and shipping at Rock Auto. I was able to score one on FB marketplace for $150. So even with the upgraded fuel hat, I'll be half of a new one. I should probably just replace the fuel pumps while I'm in there, but I'll save that for another day. My handy dandy fuel pump access hatch has made this extremely easy!
Oh believe me I understand the PP concept....My project is after a fashion doing the same thing, just not LSX powered. My only concern would be the potential for a Fuel Leak, and subsequent fire possibility, so it sounds like you have that covered. Do keep up the good work.

MNBob

  • Oracle Forum Member
  • *
  • Posts: 2018
Re: 1968 Camaro Resto-mod LS3/6 speed; Project Penny Pincher
« Reply #101 on: October 06, 2021, 05:38:49 AM »
Seats are really nice and look like they fit in the car really well!  A definite step up.  Hope you get the fuel issue sorted out.
1979 TATA Extreme TKO .64
Hedman elite; Pypes 2.5; Borla XS; MSD 6A; Performer intake; open scoop; Sniper QJ;  110 Amp Alt; 4 core radiator/Mark VIII fan; RobbMc mini starter; subframe connectors; solid body mounts; fiberglass rear springs; poly sway bar and link bushings; 81 master; D52’s; Blazer disks; 225/60 & 235/60 17's TrueContact's; relays for PW, PDL, lights; keyless entry

ryeguy2006a

  • Oracle Forum Member
  • *
  • Posts: 6038
Re: 1968 Camaro Resto-mod LS3/6 speed; Project Penny Pincher
« Reply #102 on: October 25, 2021, 08:01:41 AM »
It's been a little bit since my last update. I haven't been able to drive the car because of the fuel issue. After further investigation, I determined that unfortunately the fuel pump outlet has some micro-cracks and is weeping fuel. So that explains why I was losing pressure and got a slight gas smell after I drove the car and parked it in the garage.

It was really hard to capture in a picture, but there are a few hairline cracks on the top. The real issue I found later on though.


Rather than buying a whole new fuel pump assembly for $1k+, I opted to buy an ALM Performance replacement hat that is machined from billet aluminum and comes with a full flow -6AN fitting. It was a little pricey, but much cheaper than buying a whole new pump. It's a shame that it will be hidden under the car too. I'll have to open up my hatch from time to time and look at it.


Speaking of the fuel pump hatch, I'm SOO glad that I installed that hatch now. It was incredibly easy to remove the fuel pump. A few wiring connections, the fuel line, locking ring and it popped right out. Took me less than 3 minutes.


In order to remove the hat, you have to pop out these little c-clips. I made a little hook on the end of a piece of mechanics wire to grab and pop them off.


Pulled it all apart and cut the stock hose off.


Then to get to the other side of the hose, I had to pull apart the assembly. Started with a few little clips that retain the pumps to the bucket.


Popped off this hose.


Had to carefully pull up on this piece. There's an o-ring that seals it together tightly, so it took a little effort to pop off.


Then here's where I found the real issue with my fuel pressure. When I removed the fuel pumps, I found this junk in the bottom of the fuel bucket! Looks like a rubber band and some cardboard remnants! Upon further investigation, there was a piece even wedged in the pump inlet at the bottom of the fuel bucket!


To top that off, the fuel pump sock was disgusting. There were little bits of that cardboard among other junk. It was a used pump and I could blame the guy I bought it from, but he gave me a great price on it because it was in unknown condition. It's on me for not inspecting it more closely. There is also the possibility that the cardboard could have fallen into my tank at some point. regardless, I'm glad I found this out now before I grenaded my motor.


Huge shout out to Carl with Vaporworx! I had mentioned to him the issues with fueling that I was having and he offered to test out my module at no charge. It fit in my timeframe and he turned it around within 24 hours. It was back to me within a week, so I'm very grateful for that. Then to top it off, when I found this fuel sock I wasn't able to find a replacement. He had one in stock and got it shipped to me right away! I had it in a few days and it got me back together. If you need anything fuel related, go to Carl!


1976 Trans Am LS1 and much more...SOLD
1968 Camaro LSA, T56 Magnum, and much more...SOLD

Current Project: 1955 Nomad LC9, 4L80e, C5 brakes and etc...

ryeguy2006a

  • Oracle Forum Member
  • *
  • Posts: 6038
Re: 1968 Camaro Resto-mod LS3/6 speed; Project Penny Pincher
« Reply #103 on: October 25, 2021, 09:08:57 AM »
After I replaced the fuel sock with the new one, I moved on to installing the new fuel hose provided with the kit. I carefully sliced the old hose with a fresh razor blade and it split right open.


Clamp down the hose tightly. I happen to have a pair of the crimpers that are made for these style clamps. (I'll edit this in the future, but I'm having a fuel pressure drop at WOT that I think is from not clamping this hard enough. Will update when I find a solution)


Then I moved on to installing the new hat. It is installed in the reverse of how it was disassembled. I had to pop in those little c-clips into the guide rod, put the pump assembly back into the fuel bucket and the springs into the pocket of the bucket.


There are also a few wiring components that need to be de-pinned and put into new connectors. They are all provided with the kit.


One thing I didn't like was that this connector is bulkier and to get full compression needs to sit outside the bucket. It's not a "problem" since you can remove and install it like this, but worth noting.


Now I have a complete assembly again with much better fuel fittings. The full flow fittings should allow the pumps to flow fuel more easily so in theory should be easier on the pumps and potentially more at full duty cycle. I also measured the new outlet just for fun and it is substantially larger. By my calculations it's roughly 37% larger ID.


Next up was reinstalling the pump. I grabbed a cheap pump ring installation tool on Amazon and this is well worth the money. I popped it on and it clicked right into the slot easily with my breaker bar.


The last thing that needed to be done was swapping over the connect for the pumps. Because the mating connector for the fuel pump side isn't made, it is necessary to de-pin and reassemble using the new connector.


Good news is I was able to get in the car and after a few cycles of the fuel pump I had full pressure again. Fired up the car and had full fuel pressure! Took the car out for a spin and it performed flawlessly. What better way to break in a new fuel pump than a 2nd gear rolling burnout?

I didn't get any pictures but last night I finally got around to wiring up the manifold referenced signals to the PressureWorx module. I'm hoping to get out tonight and test it out. Should provide more fuel pressure as the boost increases. Should ensure I have no fueling issues up top. I got lazy. I ran the wires front to rear, but never took the time to hook them up. I also extended the wires for my flex fuel connector, connected it and ran it into the car. Now let's see how long it takes me to actually hook it up haha. The closest e85 station to me is about 45 mins so I'm not in a huge rush to finish the install.

Cheers,
Ryan

1976 Trans Am LS1 and much more...SOLD
1968 Camaro LSA, T56 Magnum, and much more...SOLD

Current Project: 1955 Nomad LC9, 4L80e, C5 brakes and etc...

ryeguy2006a

  • Oracle Forum Member
  • *
  • Posts: 6038
Re: 1968 Camaro Resto-mod LS3/6 speed; Project Penny Pincher
« Reply #104 on: October 25, 2021, 09:14:36 AM »
Oh and for those who are interested. Here is a picture of my fuel learn table after I drove home with the low fuel pressure. It added fuel where I was trying to keep the car running. This is an important thing to remember when you have the EFI systems that have learning capabilities. I made sure to reset the table and reflashed it back to my ECU, because if not it would be adding all that fuel and be wayyy rich. It would have probably fouled plugs and generally been bad for the motor. Similar issues happen to guys when the wideband O2 fails. When you install the new part you have to remember to reset the fuel learn tables.


1976 Trans Am LS1 and much more...SOLD
1968 Camaro LSA, T56 Magnum, and much more...SOLD

Current Project: 1955 Nomad LC9, 4L80e, C5 brakes and etc...

Re: 1968 Camaro Resto-mod LS3/6 speed; Project Penny Pincher
« Reply #104 on: October 25, 2021, 09:14:36 AM »

5th T/A

  • Oracle Forum Member
  • *
  • Posts: 1373
Re: 1968 Camaro Resto-mod LS3/6 speed; Project Penny Pincher
« Reply #105 on: October 25, 2021, 10:40:14 AM »
Ryan,

Good to see you have your fueling issues worked out. Nice write up and pictures. Usually they say hindsight is 20/20, in your case the access panel was great foresight. Having this all sorted out should give you good piece of mind.
1980 T/A with a Pontiac 461

Gone but not forgotten;
1973 T/A 455
1975 T/A 400
1978 T/A W72
1982 T/A cross fire injected

Two wheel toys;
2014 Harley Ultra Classic Limited
2013 Honda CB1100
2010 Yamaha Vmax
1982 Yamaha Seca 750

langss

  • Active Forum Member
  • *
  • Posts: 326
Re: 1968 Camaro Resto-mod LS3/6 speed; Project Penny Pincher
« Reply #106 on: October 25, 2021, 01:35:01 PM »
It's been a little bit since my last update. I haven't been able to drive the car because of the fuel issue. After further investigation, I determined that unfortunately the fuel pump outlet has some micro-cracks and is weeping fuel. So that explains why I was losing pressure and got a slight gas smell after I drove the car and parked it in the garage.

It was really hard to capture in a picture, but there are a few hairline cracks on the top. The real issue I found later on though.


Rather than buying a whole new fuel pump assembly for $1k+, I opted to buy an ALM Performance replacement hat that is machined from billet aluminum and comes with a full flow -6AN fitting. It was a little pricey, but much cheaper than buying a whole new pump. It's a shame that it will be hidden under the car too. I'll have to open up my hatch from time to time and look at it.


Speaking of the fuel pump hatch, I'm SOO glad that I installed that hatch now. It was incredibly easy to remove the fuel pump. A few wiring connections, the fuel line, locking ring and it popped right out. Took me less than 3 minutes.


In order to remove the hat, you have to pop out these little c-clips. I made a little hook on the end of a piece of mechanics wire to grab and pop them off.


Pulled it all apart and cut the stock hose off.


Then to get to the other side of the hose, I had to pull apart the assembly. Started with a few little clips that retain the pumps to the bucket.


Popped off this hose.


Had to carefully pull up on this piece. There's an o-ring that seals it together tightly, so it took a little effort to pop off.


Then here's where I found the real issue with my fuel pressure. When I removed the fuel pumps, I found this junk in the bottom of the fuel bucket! Looks like a rubber band and some cardboard remnants! Upon further investigation, there was a piece even wedged in the pump inlet at the bottom of the fuel bucket!


To top that off, the fuel pump sock was disgusting. There were little bits of that cardboard among other junk. It was a used pump and I could blame the guy I bought it from, but he gave me a great price on it because it was in unknown condition. It's on me for not inspecting it more closely. There is also the possibility that the cardboard could have fallen into my tank at some point. regardless, I'm glad I found this out now before I grenaded my motor.


Huge shout out to Carl with Vaporworx! I had mentioned to him the issues with fueling that I was having and he offered to test out my module at no charge. It fit in my timeframe and he turned it around within 24 hours. It was back to me within a week, so I'm very grateful for that. Then to top it off, when I found this fuel sock I wasn't able to find a replacement. He had one in stock and got it shipped to me right away! I had it in a few days and it got me back together. If you need anything fuel related, go to Carl!


Not to say "I Told You So".... But I Did....lol.....
If you are referring to those fittings that adapt the GM quick connect to AN that use the plastic retainers, yes, they are prone to leaking. Bad news. I have an adapter that is a GM quick connect female/male fitting that gives me a 1/8" NPT plug for my PWM module, but it's designed well and has a captured retaining ring. Hopefully I'll get some time to diagnose it. I'll make sure to update the thread. If the fitting on the fuel pump hat is broken, I'll probably upgrade to a billet aluminum hat that's made by a company called ALM Performance. But I'll have to hold off until later since that kit is $310 bucks.
Since I'm light years away from what you have accomplished, I had to see what $310 got you....Well all I can say is "Buy Once, Cry Once"....Its sad that its hidden and nobody but "You" will ever get to see it, but judging buy the notes on what it replaces, and how many different applications, I think its an idea whose time has arrived.

ryeguy2006a

  • Oracle Forum Member
  • *
  • Posts: 6038
Re: 1968 Camaro Resto-mod LS3/6 speed; Project Penny Pincher
« Reply #107 on: October 26, 2021, 05:30:22 AM »
Not to say "I Told You So".... But I Did....lol.....

I should have listened haha. But it's all back together now, but I may need to pull the pump back out to tighten a fitting I crimped on. Running I have the full pressure, but as soon as I turn the key off, the pressure rapidly drops to 5 psi. After talking with the guy who made the fuel hat, he thinks I didn't crimp it hard enough which is causing it to leak internally.

1976 Trans Am LS1 and much more...SOLD
1968 Camaro LSA, T56 Magnum, and much more...SOLD

Current Project: 1955 Nomad LC9, 4L80e, C5 brakes and etc...

langss

  • Active Forum Member
  • *
  • Posts: 326
Re: 1968 Camaro Resto-mod LS3/6 speed; Project Penny Pincher
« Reply #108 on: October 26, 2021, 08:59:44 AM »
Not to say "I Told You So".... But I Did....lol.....

I should have listened haha. But it's all back together now, but I may need to pull the pump back out to tighten a fitting I crimped on. Running I have the full pressure, but as soon as I turn the key off, the pressure rapidly drops to 5 psi. After talking with the guy who made the fuel hat, he thinks I didn't crimp it hard enough which is causing it to leak internally.
If I had a dollar for every time I passed up doing something I should have because I didn't want to spend the money at the time, I could have probably retired years earlier. But I like you hate to spend the same money twice on the same thing. So, I think that's just normal... What I am most happy for you is that it never caused anything to go sideways. I have personal experience with fuel leaks that if I had not moved as quickly as I did, would have been the end of a host of great memories and all on me. Kind of "For want of a nail the shoe was lost. For want of a shoe the horse was lost". So As Larry would say...Git Er Done...and go have some fun with that ride.   

jonathonar89

  • Oracle Forum Member
  • *
  • Posts: 2508
    • Mark's Cars Inc.
Re: 1968 Camaro Resto-mod LS3/6 speed; Project Penny Pincher
« Reply #109 on: October 26, 2021, 09:19:29 AM »
This is one badass sending unit.  I'm waiting for you to start pushing 1,000hp now lol

Good stuff,
Jon
Mark's Cars Inc.

https://markscarsinc.com

ryeguy2006a

  • Oracle Forum Member
  • *
  • Posts: 6038
Re: 1968 Camaro Resto-mod LS3/6 speed; Project Penny Pincher
« Reply #110 on: October 26, 2021, 11:15:53 AM »
I'm always open to sponsors haha. All I'd need to do is port the blower, stroke the motor to 416, upgrade the lower pulley and run it all on e85. Any takers??

Oh, and fuel upgrades, trans upgrade, rear diff upgrade and etc... :lol:

1976 Trans Am LS1 and much more...SOLD
1968 Camaro LSA, T56 Magnum, and much more...SOLD

Current Project: 1955 Nomad LC9, 4L80e, C5 brakes and etc...

ryeguy2006a

  • Oracle Forum Member
  • *
  • Posts: 6038
Re: 1968 Camaro Resto-mod LS3/6 speed; Project Penny Pincher
« Reply #111 on: October 28, 2021, 08:48:29 AM »
On another note, I successfully wired up my flex fuel sensor! It's hard to say if it's working correctly because at first I was expecting to see the content to be closer to 10% (or zero on my 1D scale), but it was hovering around 1%? Then I remembered the last time I got high octane fuel, that it was ethanol free. I'm hoping to go for a drive before the weather gets too bad and try to find some e85 and mix it to something like e30-40. Just to see how the sensor reacts and adapts to the blended fuel.

Lastly, and something I'm most excited about is I've set up an appointment for the local dyno guy to have a few power pulls done. I'm not having it dyno tuned, just the power pulls. I'm very happy with my tune-up and I'm hoping that will lend itself to see at least 600 HP. Based on what other's have seen, I think this is pretty reasonable.

1976 Trans Am LS1 and much more...SOLD
1968 Camaro LSA, T56 Magnum, and much more...SOLD

Current Project: 1955 Nomad LC9, 4L80e, C5 brakes and etc...

FormTA

  • Oracle Forum Member
  • *
  • Posts: 5539
  • Life is short, have fun, Drive a T/A
Re: 1968 Camaro Resto-mod LS3/6 speed; Project Penny Pincher
« Reply #112 on: October 28, 2021, 10:39:52 AM »
My buddy has a Cadillac V and switching to ethanol is quite a difference!
79 Trans am low buck LS swapped
79 Formula 301 (Work in progress)
67 RS Camaro (waiting it's turn)
69 Dodge charger on late model charger chassis
49 Ford F1 on a 2003 Chevy ZR2 Chassis (current project)
Names, Luke. If I hear anyone telling me they're my father....

ryeguy2006a

  • Oracle Forum Member
  • *
  • Posts: 6038
Re: 1968 Camaro Resto-mod LS3/6 speed; Project Penny Pincher
« Reply #113 on: November 05, 2021, 01:53:07 PM »
Ok, well I've been through a bit of a rollercoaster since my last update. As I was tuning my car before my dyno session for some power pulls, I realized that I was running out of fuel in full boost. It was very discouraging, because I was really looking forward to getting the car on the dyno... Being that I'm in NY, we have very little time before we get a snowstorm and the towns all spread salt on the roads. But after bouncing some ideas off some trusted car colleagues (thanks Andrew), I was able to determine that it's very likely that my one or both of my stock fuel pumps are failing or weak. They are just not able to keep up with my fuel demands in boost and rpms. I took a data log and you can see here in the blue is my fuel pressure and the yellow is the ECU trying to add back fuel.  Fuel pressure gets down to around 22psi in full boost, but with the fuel module it ramps up the fuel pressure 1:1 with boost. So, I've definitely got a problem...

One thing that may not be clear from this graph though is Holley saved my engine. If I was running a stock ECU that didn't have the ability to add that much fuel up top in boost, I would likely be shopping for a new short block.


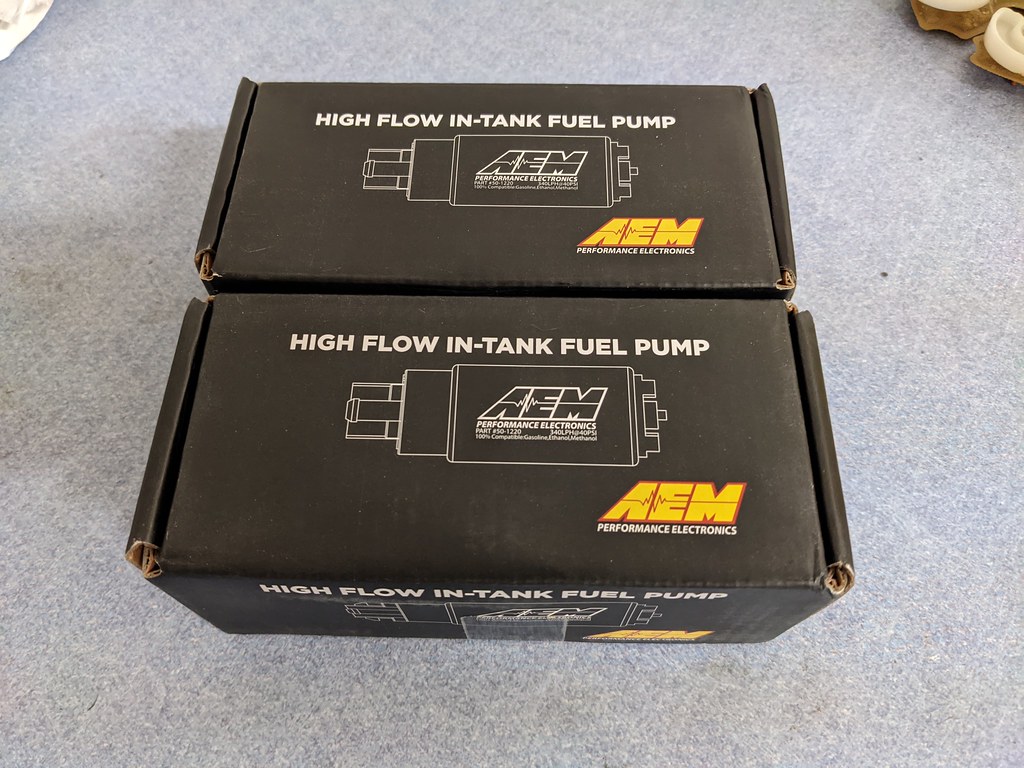
The solution was to contact Carl at Vaporworx and order a pair of upgraded fuel pumps from AEM. He recommended a pair of AEM 320 lph @ 43psi pumps which are a direct swap for the stock 190 lph CTS-V fuel pumps. This should provide me plenty of fuel all the way up to 60+ psi and even have enough flow if/when I run e85. Carl was able to expedite them to me and I was able to swap them out last night.


I'm getting pretty good at this by now... here's how the stock pumps attach inside the bucket.


Pop off the white retaining clip, and the fuel pumps pull right out.


Here you can see the fuel pumps are an exact direct fit for the stockers. Wiring harness and all.


One thing that does need to be swapped over is the little white spacers from the stock pumps. They go on first and I used one of the new o-rings that came with the kit.


Then they just slide right in. The fuel socks are separate, but they all fit inside the bucket nicely. Then it was all back together and ready to go. SOOO glad that I added that fuel door in the trunk. I would have gotten sick of pulling that tank by now...


Then it was time for the moment of truth. Was that really the issue??? I went out to do a little testing and tuning and found out that was exactly my problem! I took the car out for about an hour during my lunchbreak and honed in my in boost fuel VE table. It was way out of wack, but I was able to get a few data points and get it looking wayyy better.

Here I am out mingling and trying to fit in...


I played around with my fueling once I grabbed lunch, then took a log on the way home. Bingo, that's what I wanted to see! Rising fuel pressure along with the boost. Blue is fuel pressure, yellow is CL compensation, and I added green for boost. Fuel pressure stays constant, then rises with boost. Fuel trims still need work as you can see. Too rich as it's pulling 25% fuel, but I'd rather be too rich than too lean up top. Looks like for this run I topped out at just shy of 11psi.


I also got this cool shot when I brought my car to work last week.


I re-scheduled my Dyno appointment for Monday so wish me luck. I think I'm ready now. It's definitely running as strong as ever now.

Cheers,
Ryan

1976 Trans Am LS1 and much more...SOLD
1968 Camaro LSA, T56 Magnum, and much more...SOLD

Current Project: 1955 Nomad LC9, 4L80e, C5 brakes and etc...

5th T/A

  • Oracle Forum Member
  • *
  • Posts: 1373
Re: 1968 Camaro Resto-mod LS3/6 speed; Project Penny Pincher
« Reply #114 on: November 05, 2021, 02:35:36 PM »
Ryan,

This time it looks like you have really worked out all your fuel delivery issues. With the new pumps 680 LPH is a lot of fuel, I would think more than enough! While reading through your post I kept thinking the same thing about the access panel in your trunk. You must have had a premonition about having to repetitively pull the pumps back out. Obviously the access door was a great idea. When I did my car I was more afraid of leaks from the pump module or sending unit than pump problems. Putting the tank in empty once was bad enough. I would hate to be wrestling with a tank half full of fuel.

Keeping my fingers crossed for you and looking forward to hearing about your dyno runs.
1980 T/A with a Pontiac 461

Gone but not forgotten;
1973 T/A 455
1975 T/A 400
1978 T/A W72
1982 T/A cross fire injected

Two wheel toys;
2014 Harley Ultra Classic Limited
2013 Honda CB1100
2010 Yamaha Vmax
1982 Yamaha Seca 750

langss

  • Active Forum Member
  • *
  • Posts: 326
Re: 1968 Camaro Resto-mod LS3/6 speed; Project Penny Pincher
« Reply #115 on: November 05, 2021, 03:51:25 PM »
I have dropped the tank on my first 78 to fix a leaking return line, and on two other 3rd gens. 2nd gen was easy...rubber fuel line behind the LT FT wheel house, drained the tank in a matter of minutes. 3rd gens are a pain in the A$$...You have to siphon the fuel out. Lucky for me the Wife liked to run on fumes, so when the pump burned up, the tank was nearly empty....She had to sit with the Hood Up, Flashers On, for half an hour in heavy traffic....lol... Second one was an almost full tank of really stale gas, but still not all that bad. Worst part was dropping the Rear Axel....A hatch would have made both pretty simple. Still not as bad as changing a Heater Core on a 3rd Gen.

scarebird

  • Oracle Forum Member
  • *
  • Posts: 1900
  • Former brake guy
Re: 1968 Camaro Resto-mod LS3/6 speed; Project Penny Pincher
« Reply #116 on: November 05, 2021, 08:34:27 PM »
...3rd gens are a pain in the A$$...

Have to drop the exhaust too.  Swapped out a whole 85 TPI setup in to a 83 Berlinetta:  engine, trans, harnesses, axle, fuels lines, etc.

ryeguy2006a

  • Oracle Forum Member
  • *
  • Posts: 6038
Re: 1968 Camaro Resto-mod LS3/6 speed; Project Penny Pincher
« Reply #117 on: November 08, 2021, 07:16:45 AM »
Ryan,

This time it looks like you have really worked out all your fuel delivery issues. With the new pumps 680 LPH is a lot of fuel, I would think more than enough! While reading through your post I kept thinking the same thing about the access panel in your trunk. You must have had a premonition about having to repetitively pull the pumps back out. Obviously the access door was a great idea. When I did my car I was more afraid of leaks from the pump module or sending unit than pump problems. Putting the tank in empty once was bad enough. I would hate to be wrestling with a tank half full of fuel.

Keeping my fingers crossed for you and looking forward to hearing about your dyno runs.

Funny you mention that. If I'm totally honest, I had planned on this. After reading about the CTS-V pumps, they are prone to having the fuel outlet on the hat breaking. I also planned on future fueling upgrades so it made sense to put in a little time now to save a bunch of time later. I just wasn't anticipating doing them all so soon! I think I've had the fuel pump assembly in and out 4 times, now. So just guessing that it would take me around 30-45 minutes each time to pull out the tank, I think I made a good decision.

1976 Trans Am LS1 and much more...SOLD
1968 Camaro LSA, T56 Magnum, and much more...SOLD

Current Project: 1955 Nomad LC9, 4L80e, C5 brakes and etc...

kentucky yeti

  • Jedi Council
  • Oracle Forum Member
  • *
  • Posts: 13359
  • located in western Ky
Re: 1968 Camaro Resto-mod LS3/6 speed; Project Penny Pincher
« Reply #118 on: November 08, 2021, 07:21:07 AM »
Your cars are always so awesome!
Mike (aka Yeti)

1977 Y82 W72 Auto
2015 F-150 Lariat 4x4 (twin turbo)
2016 Explorer Limited
2012 Mustang

langss

  • Active Forum Member
  • *
  • Posts: 326
Re: 1968 Camaro Resto-mod LS3/6 speed; Project Penny Pincher
« Reply #119 on: November 08, 2021, 09:11:19 AM »


[/quote]

Funny you mention that. If I'm totally honest, I had planned on this. After reading about the CTS-V pumps, they are prone to having the fuel outlet on the hat breaking. I also planned on future fueling upgrades so it made sense to put in a little time now to save a bunch of time later. I just wasn't anticipating doing them all so soon! I think I've had the fuel pump assembly in and out 4 times, now. So just guessing that it would take me around 30-45 minutes each time to pull out the tank, I think I made a good decision.
[/quote]I agree with you...The hatch just makes good sense.  In my case....even though the tank was empty and I was working on a clean concrete floor, dropping it was the easy part. But its awkward trying to lift, hold and attach things all at the same time trying to put it back up. I used a floor jack and a piece of plywood with some thin pieces screwed to it to semi locate it, but still doing it buy yourself isn't on the list for great ways to spend time.

Re: 1968 Camaro Resto-mod LS3/6 speed; Project Penny Pincher
« Reply #119 on: November 08, 2021, 09:11:19 AM »
You can help support TAC!